

Target audience: You have already used AI (v0, ChatGPT, Claude, Windsurf, etc.) to generate a set of web page files, but you don’t know how to actually publish
index.htmlto the internet so that others can access it through a domain name.
📺 The video tutorial is now live on Bilibili — it works even better alongside the written guide 👇
Video link: https://b23.tv/kUBOrLl
1. Why Do You Still Need to “Deploy” It?
Using AI to build a website is only the first step. What you end up with is just a bunch of files:
my-website/
├── index.html
├── style.css
├── script.js
└── images/
For now, these files only live on your computer. For others to access them, three things need to be in place at the same time:
- Website files: Already generated by the AI.
- Domain name: The URL that people type into their browsers.
- Hosting server: Stores the files and delivers them when someone visits the domain name.
The combination used in this tutorial is:
- KataBump: Get a free second-level domain name (e.g.,
yourname.kdns.fr) for free. - Cloudflare Drop: Drag and drop or select your local folder to upload it, and it will directly generate an accessible website.
- Cloudflare: Handles domain name resolution, HTTPS certificates, and global CDN acceleration.
The whole process requires no credit card, no purchasing a server, and no knowledge of Linux.
2. Prepare the Materials
Before you start, make sure you have the following:
- An email address that can receive emails properly (used to register with KataBump and Cloudflare).
- A static website folder generated by AI, with
index.htmlin the root directory. - Network access to
dashboard.katabump.comandcloudflare.com.
What is a “Static Website”?
A static website consists only of front-end files such as HTML, CSS, JavaScript, and images, without any backend databases or Node.js/Python services. Most landing pages, personal homepages, portfolios, and blog templates generated by AI are static websites.
If the AI tool you used generated a .zip compressed file, please unzip it on your computer first and make sure that index.html is in the root directory of the folder.
3. Overview of the Entire Process
The whole process can be divided into four main stages:
| Stage | Platform | Goal |
|---|---|---|
| 1 | KataBump | Get a free domain name |
| 2 | Cloudflare | Host the domain on Cloudflare and obtain the name server address |
| 3 | KataBump | Enter the Cloudflare name servers back into KataBump |
| 4 | Cloudflare Drop | Upload the website folder, deploy it, and bind it to your own domain |
The following is a detailed explanation of each step in order.
4. Phase 1: Get a Free Domain Name on KataBump
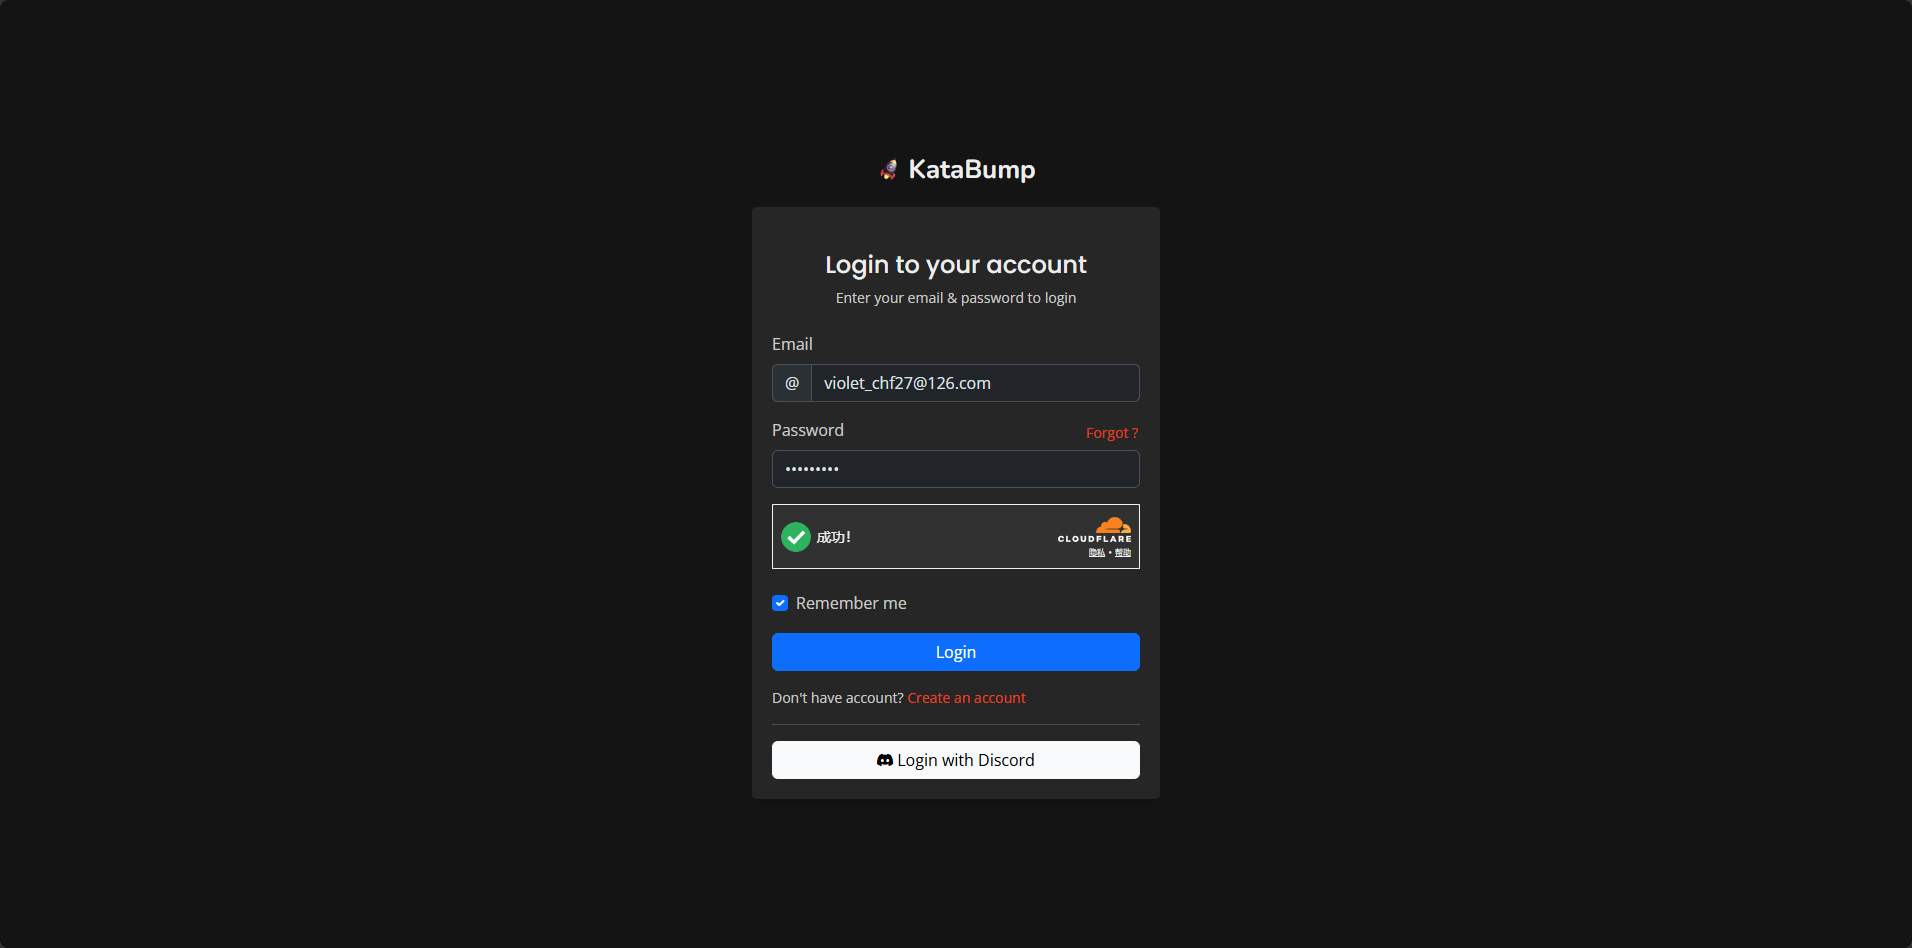
1. Open KataBump and Log In
Visit the official console:
https://dashboard.katabump.com/If you don’t have an account yet, click “Create an account” on the page to register with your email address; if you already have an account, just enter your email and password to log in. The login page also supports quick login via Discord.
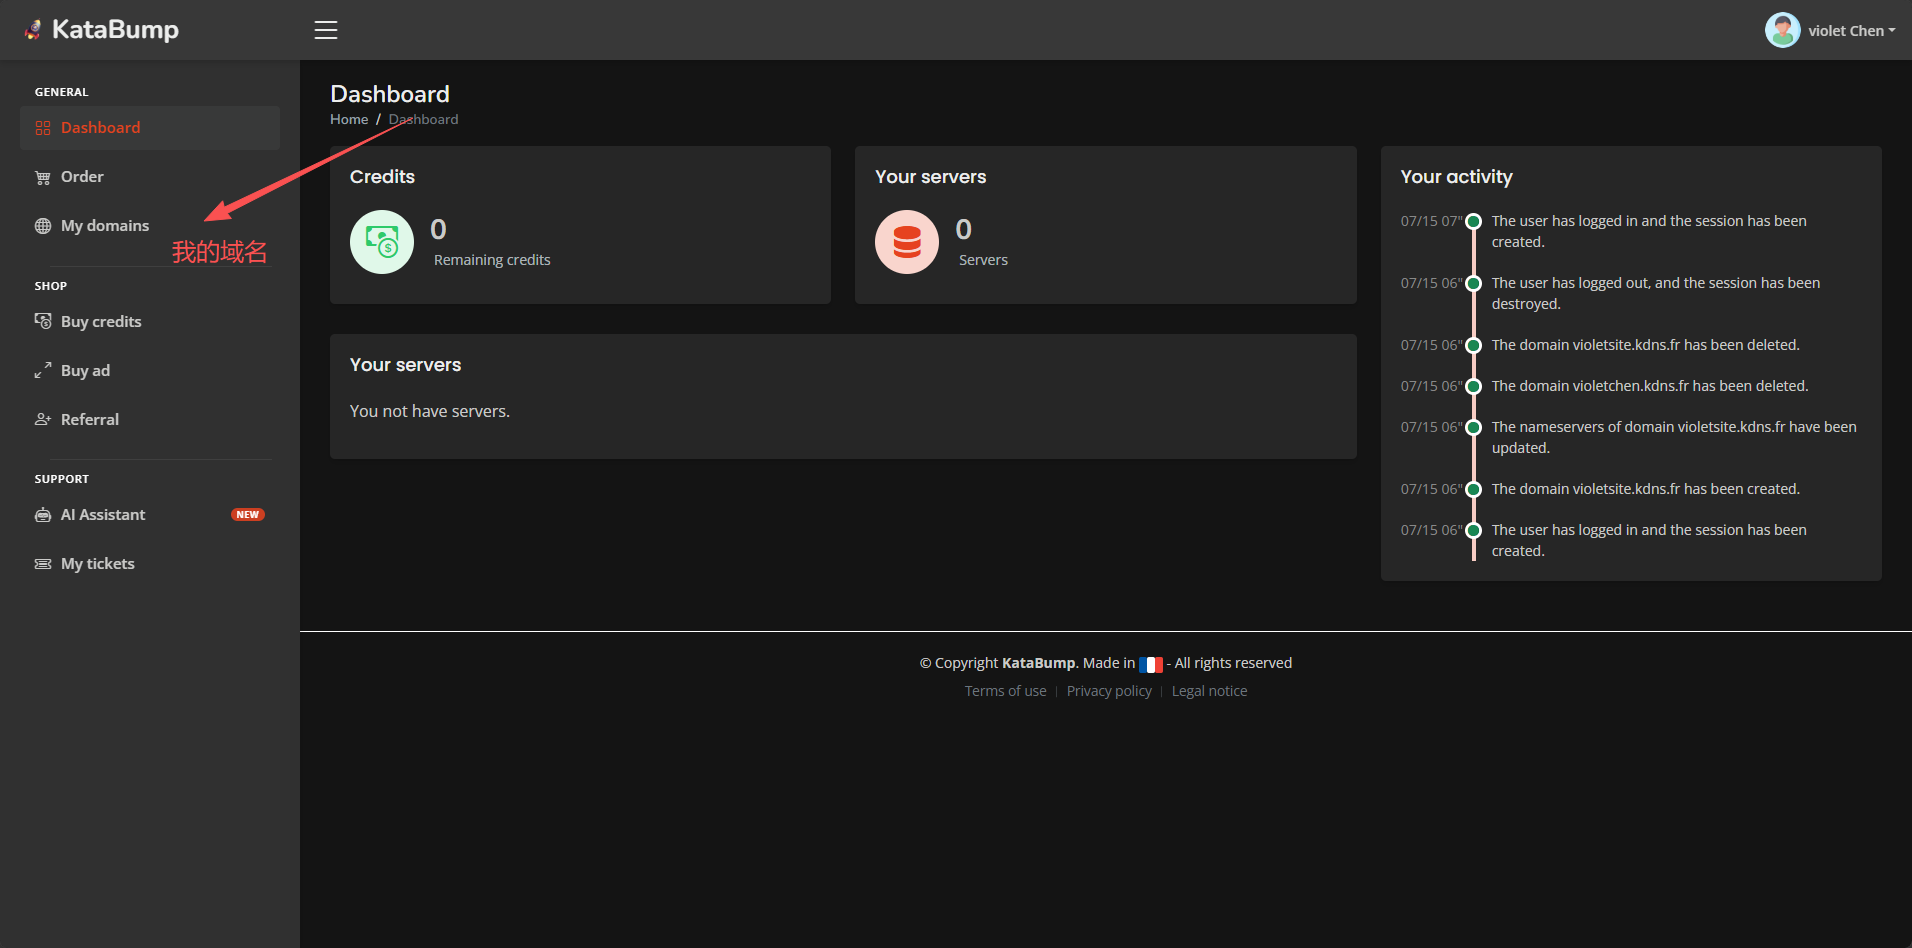
2. Access “My Domains”
After successful login, click on “My Domains” in the left menu.
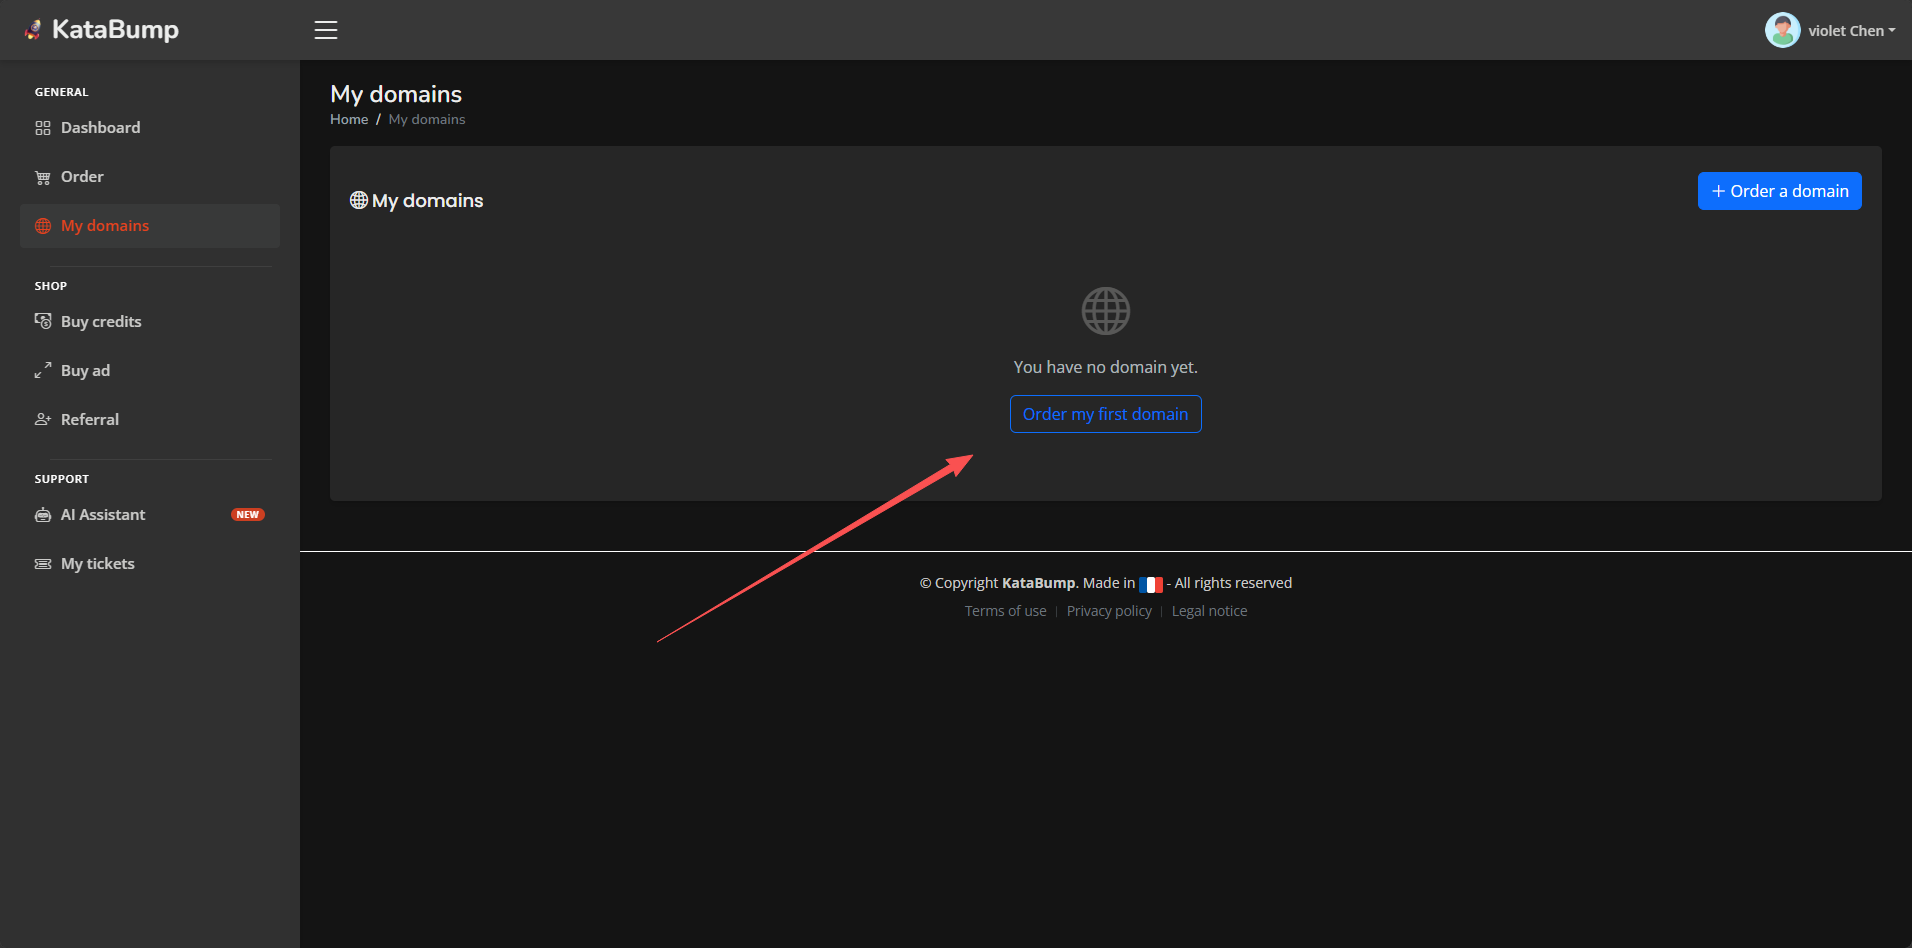
3. Obtain Your First Domain
Click on the “Get my first domain” button on the page.
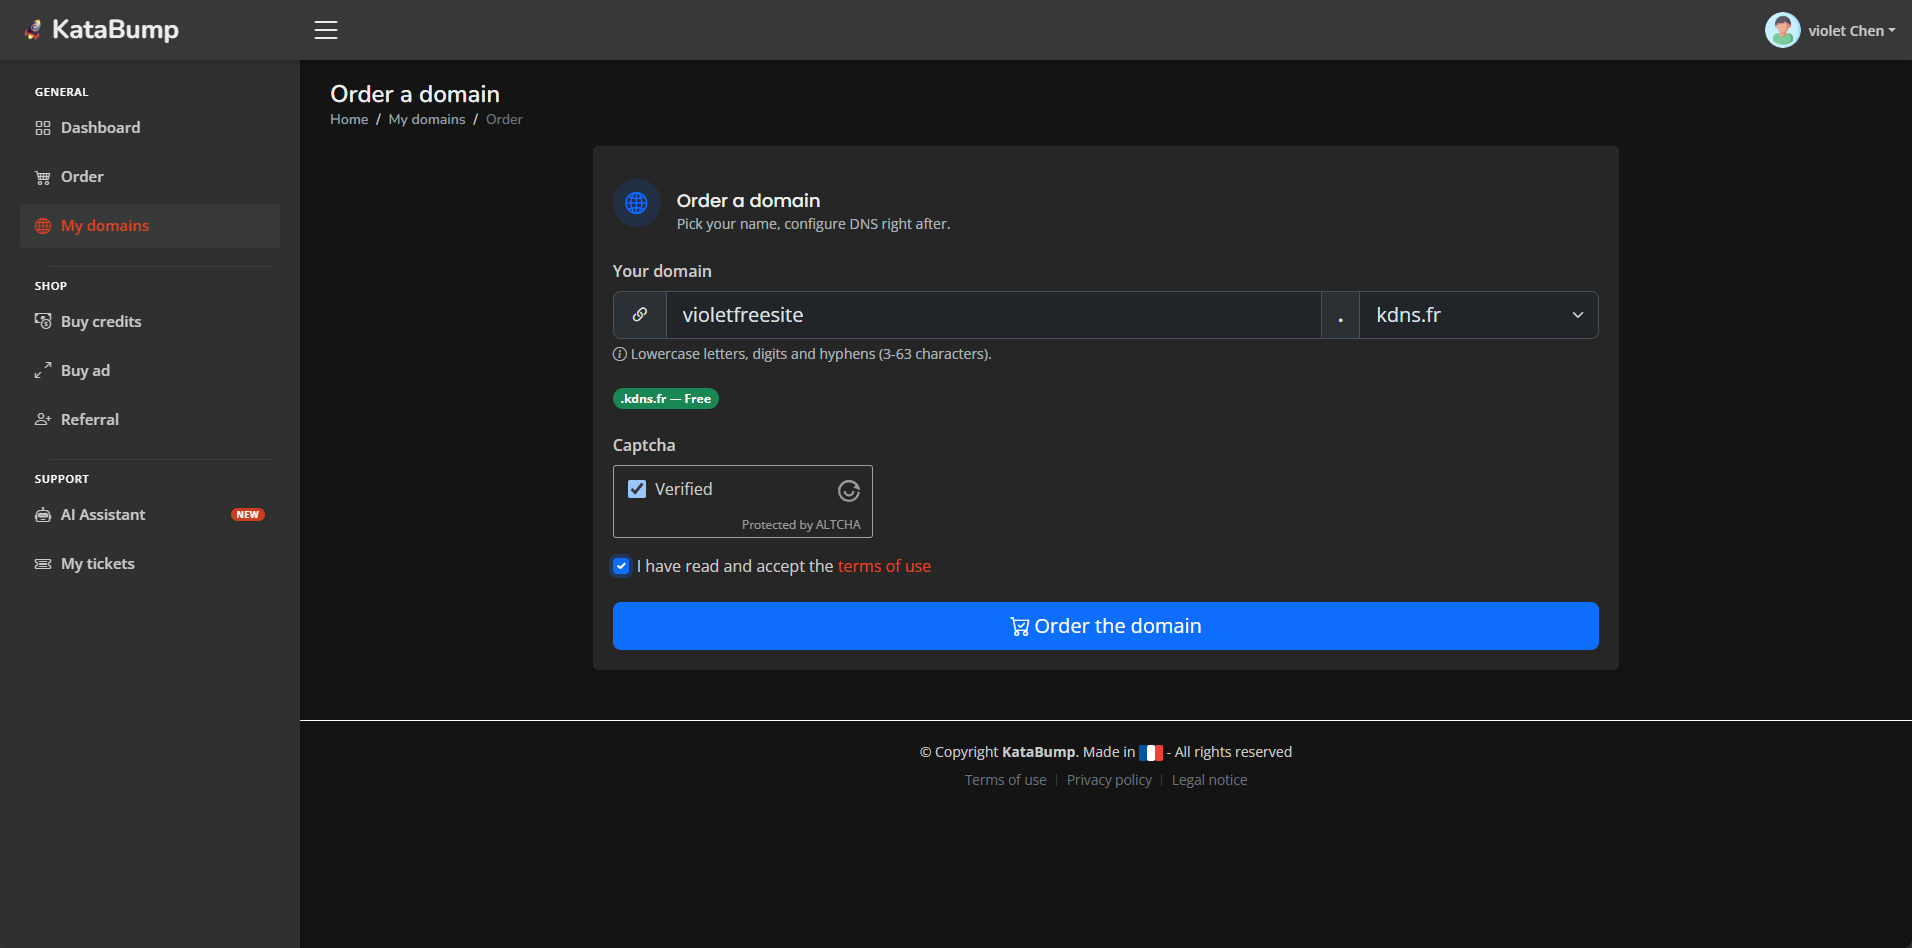
4. Enter Domain Information
Enter the prefix you want in the domain name field and select an available free suffix. Suggestions:
- Use only letters, numbers, or hyphens for the prefix; avoid Chinese characters and special symbols.
- Choose a suffix marked as Free, such as
.kdns.fr. - Write down the full domain name you will obtain, for example,
yourname.kdns.fr.
5. Success
If the domain name is available, you will see a green success message and be directed to the domain management page. The page will display your full domain name, expiration date, and access to the name server configuration.
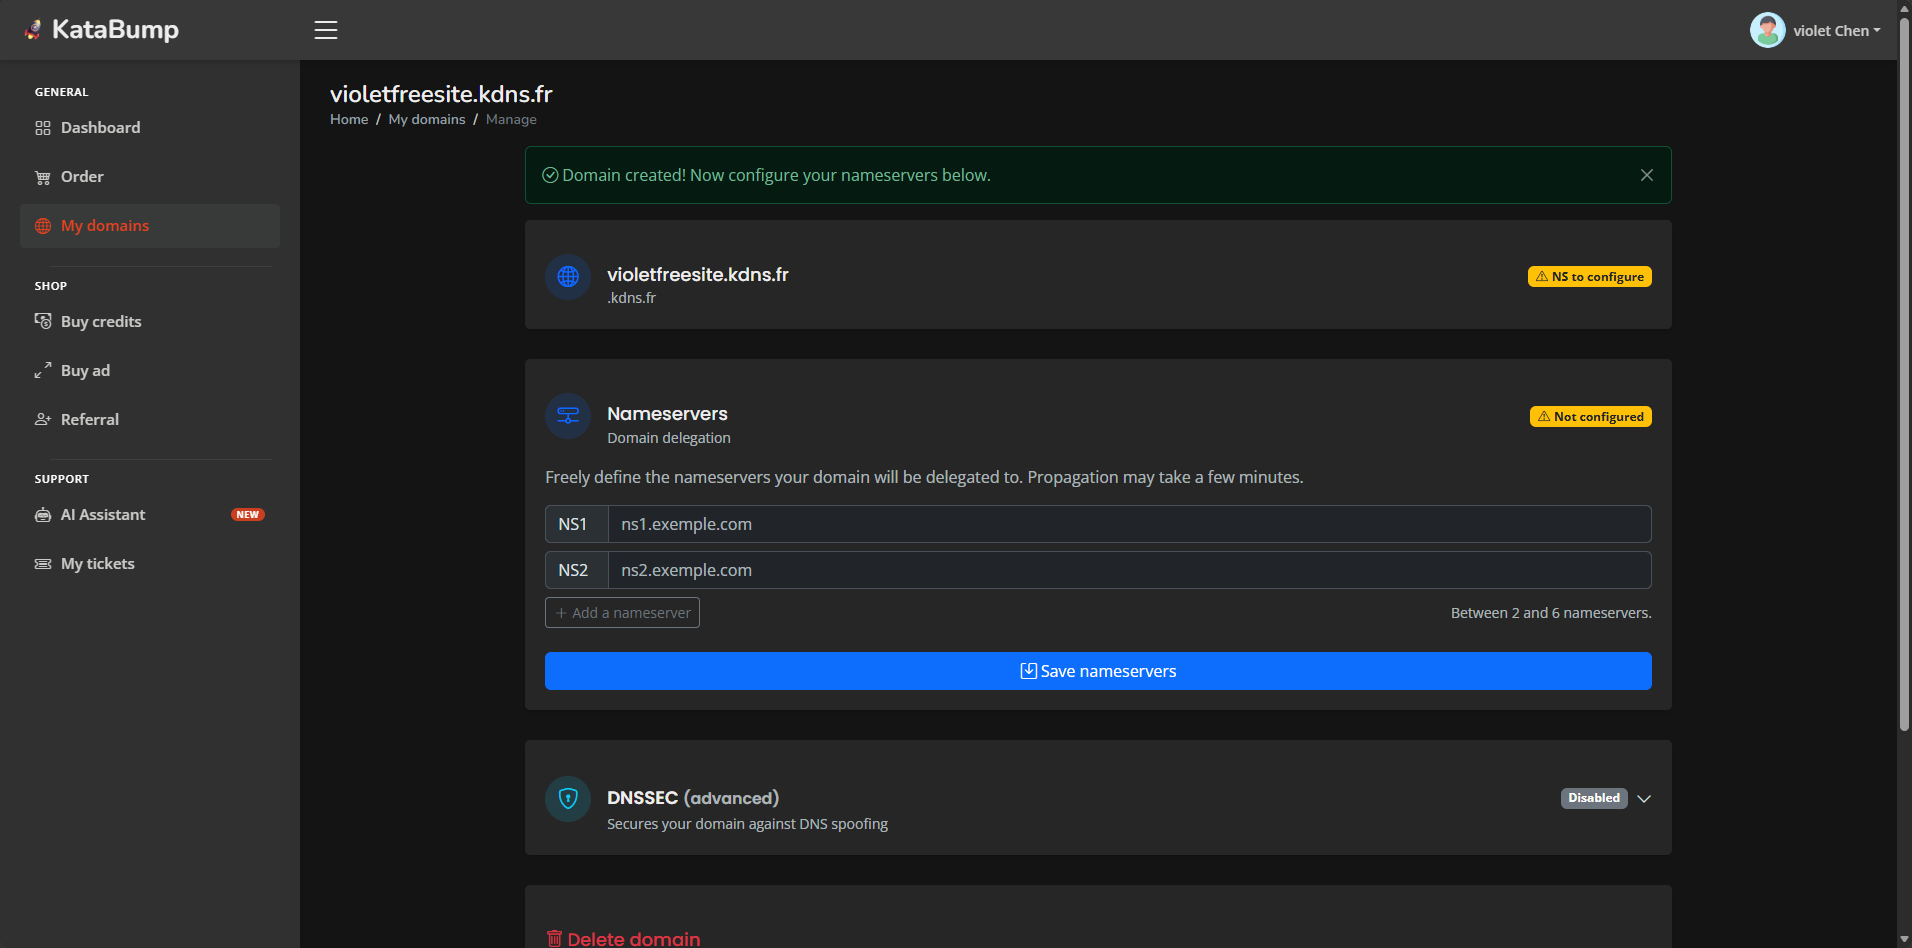
Important Note: Copy down the full domain name (e.g.,
yourname.kdns.fr), as you will need it later when adding the domain to Cloudflare.
5. Phase 2: Host the Domain on Cloudflare
Cloudflare is a globally renowned CDN and DNS service provider that offers free domain name resolution, SSL certificates, and basic DDoS protection. We need to “host” the free domain name we just obtained on Cloudflare before we can use Cloudflare Drop to deploy and bind a custom domain.
1. Log in to Cloudflare
Visit:
https://dash.cloudflare.com/loginRegister or log in using your email address. If you already have an account, simply log in.
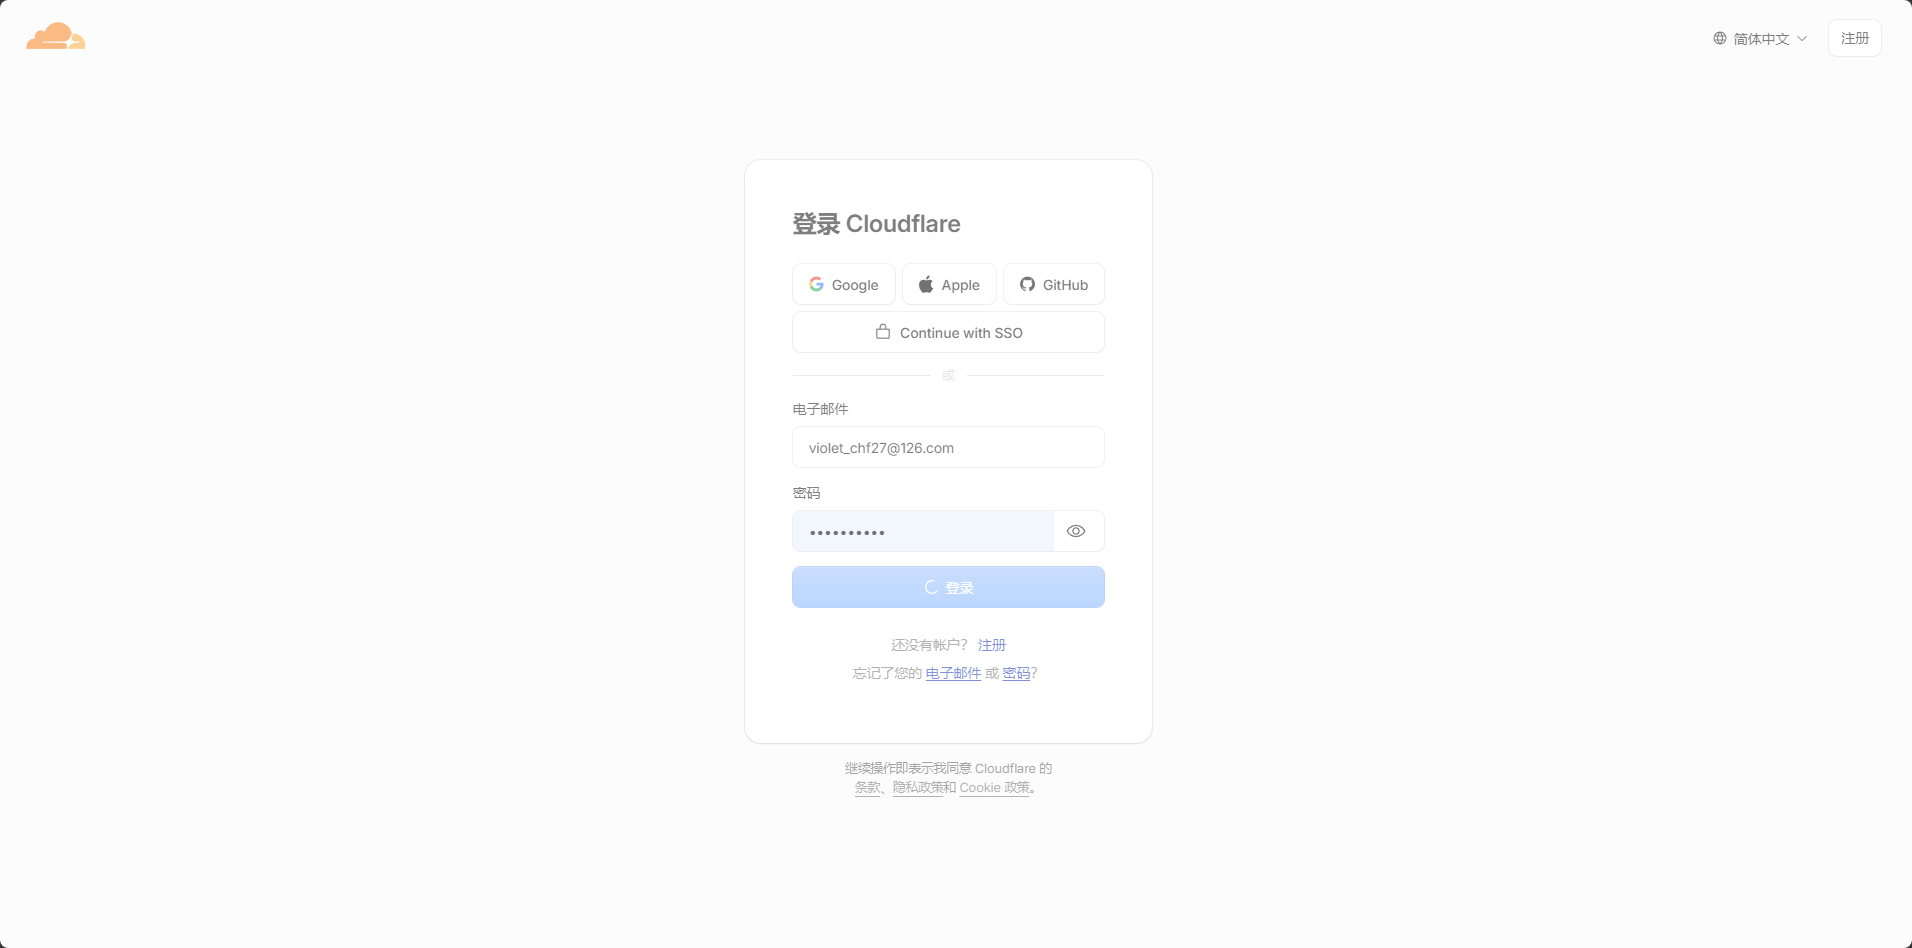
2. Add a Site
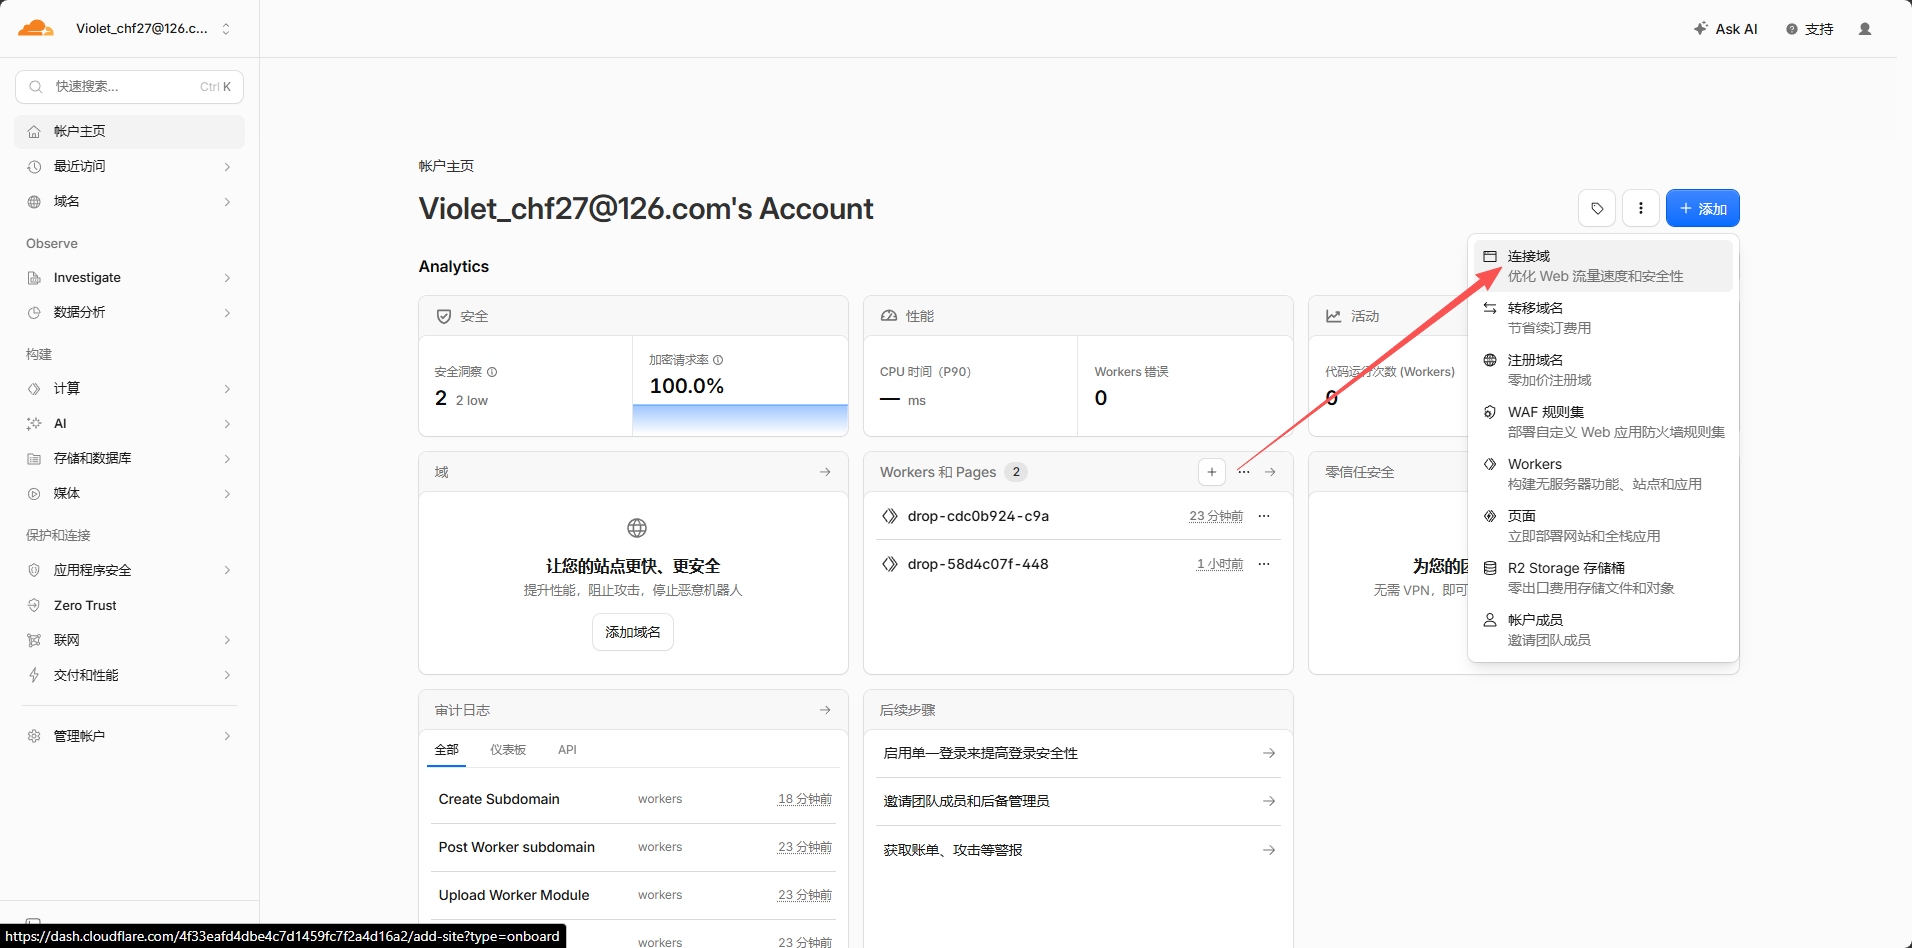
After logging in, click on “Add a site”.
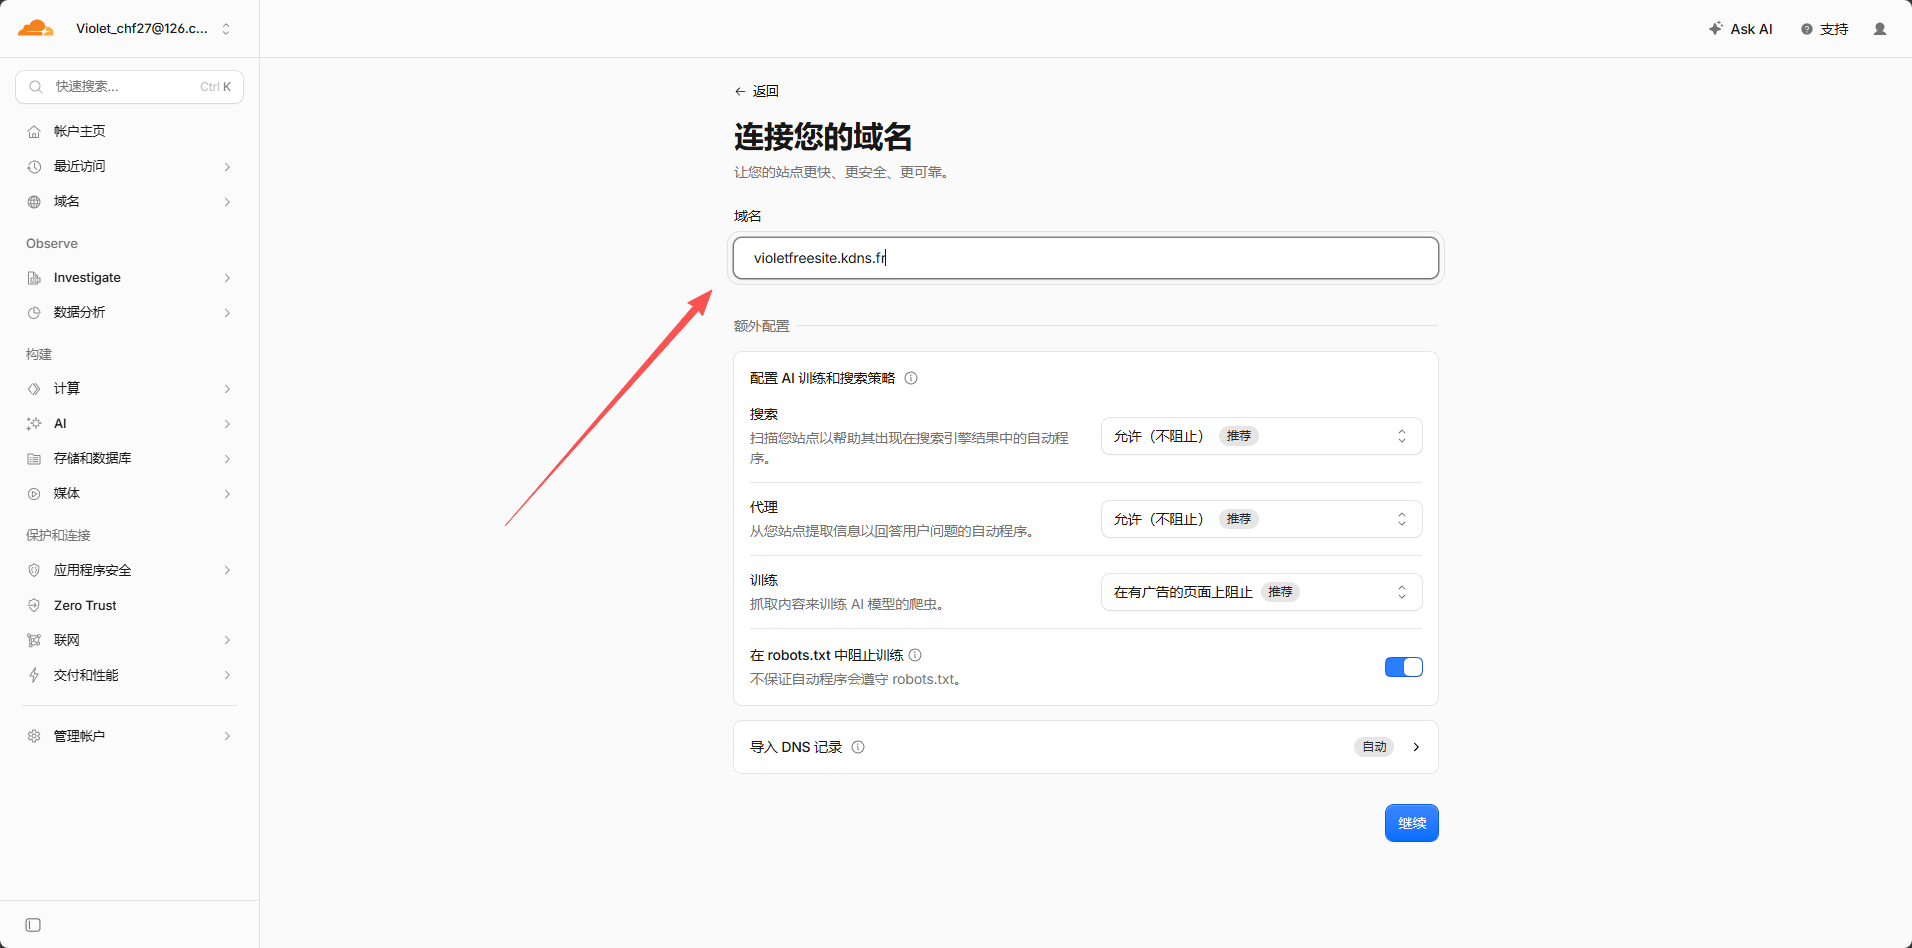
First, click on the “Add a domain” button to start the domain addition process. Paste the full domain name you obtained from KataBump into the domain name field (e.g., yourname.kdns.fr), and then click Continue.
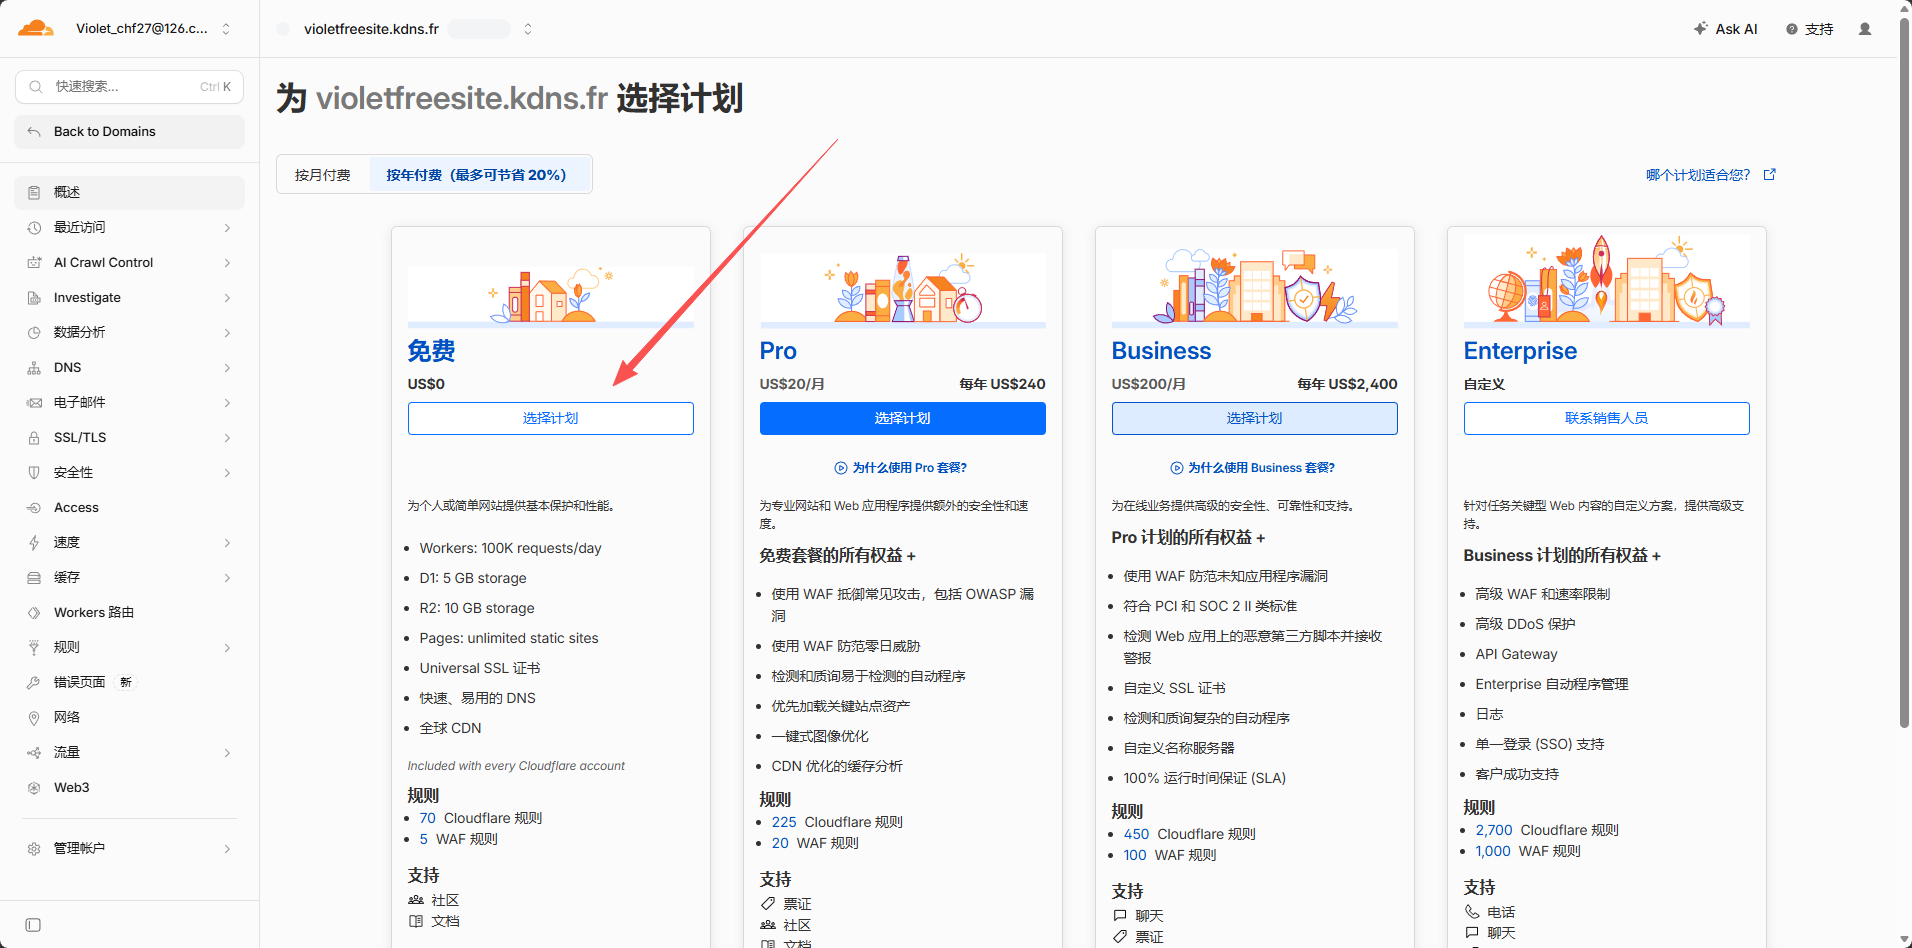
3. Select a Free Plan
Cloudflare will let you choose a plan. Simply select “Free”.
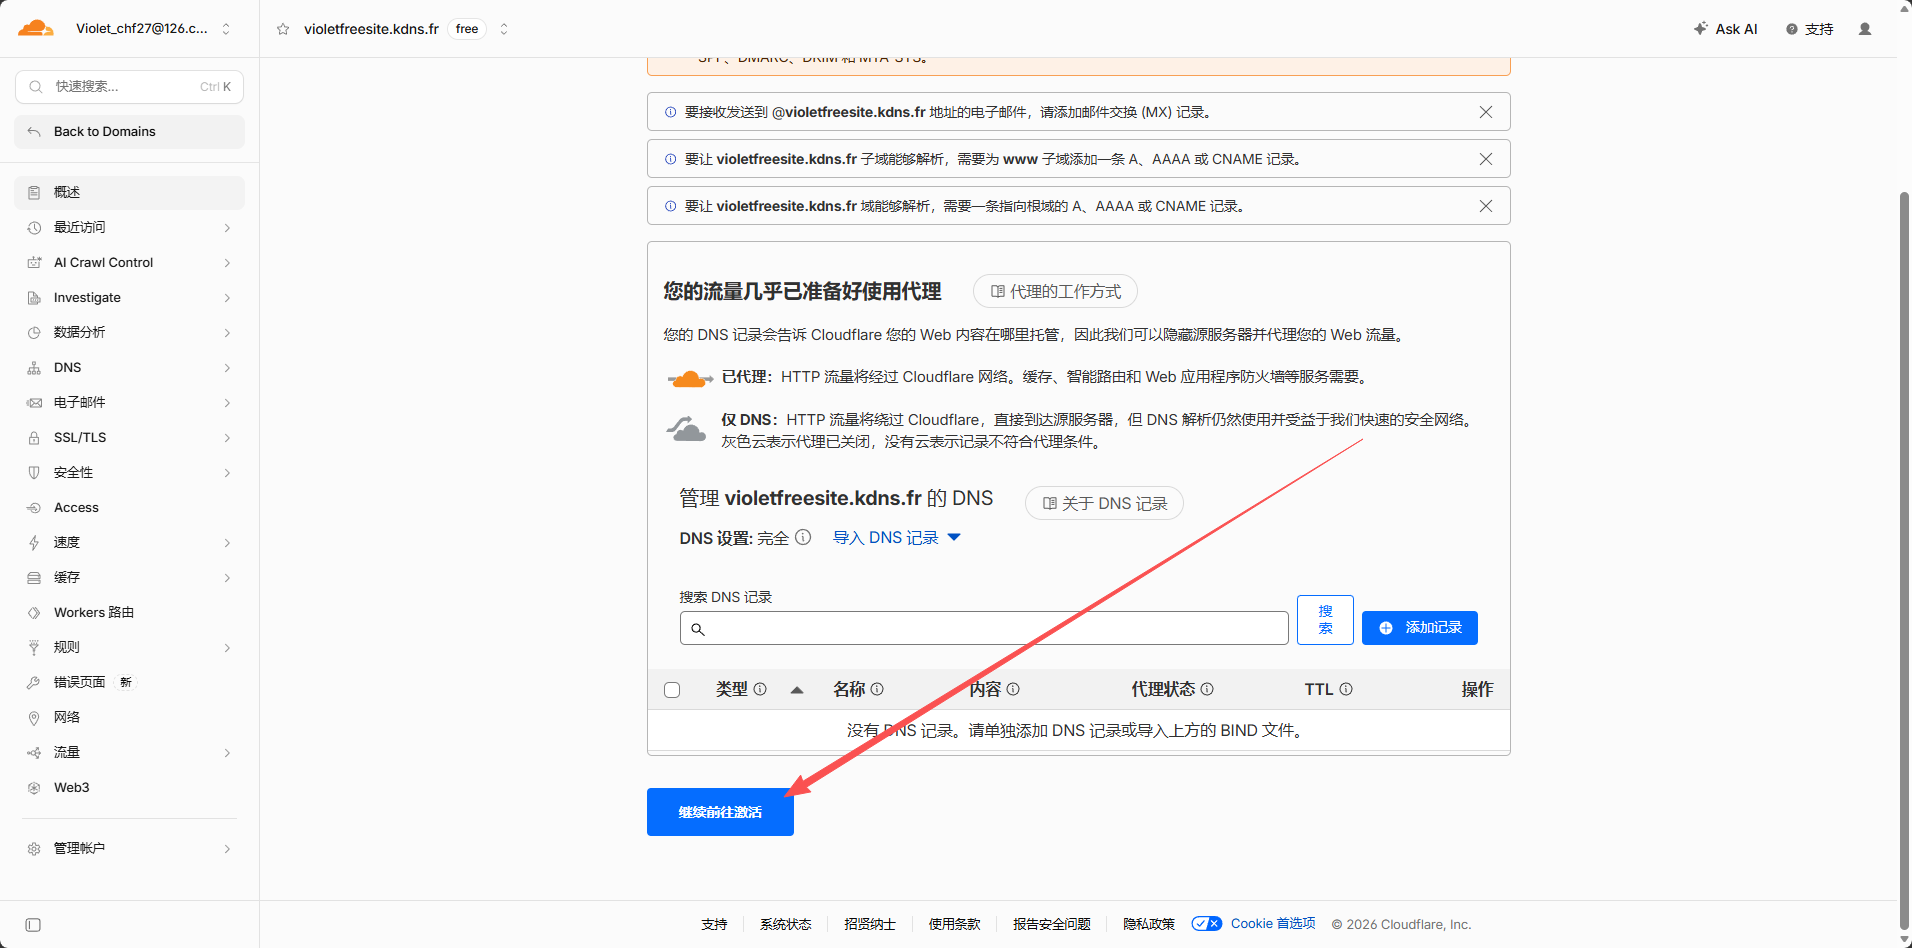
4. Continue with Activation
Click Continue to activate and proceed to the name server settings page.
5. Obtain Cloudflare Name Servers
Cloudflare assigns two name servers (Nameservers). For example:
ada.ns.cloudflare.com
greg.ns.cloudflare.com
The servers assigned to different accounts or domain names may vary; please refer to the information displayed on the Cloudflare page.
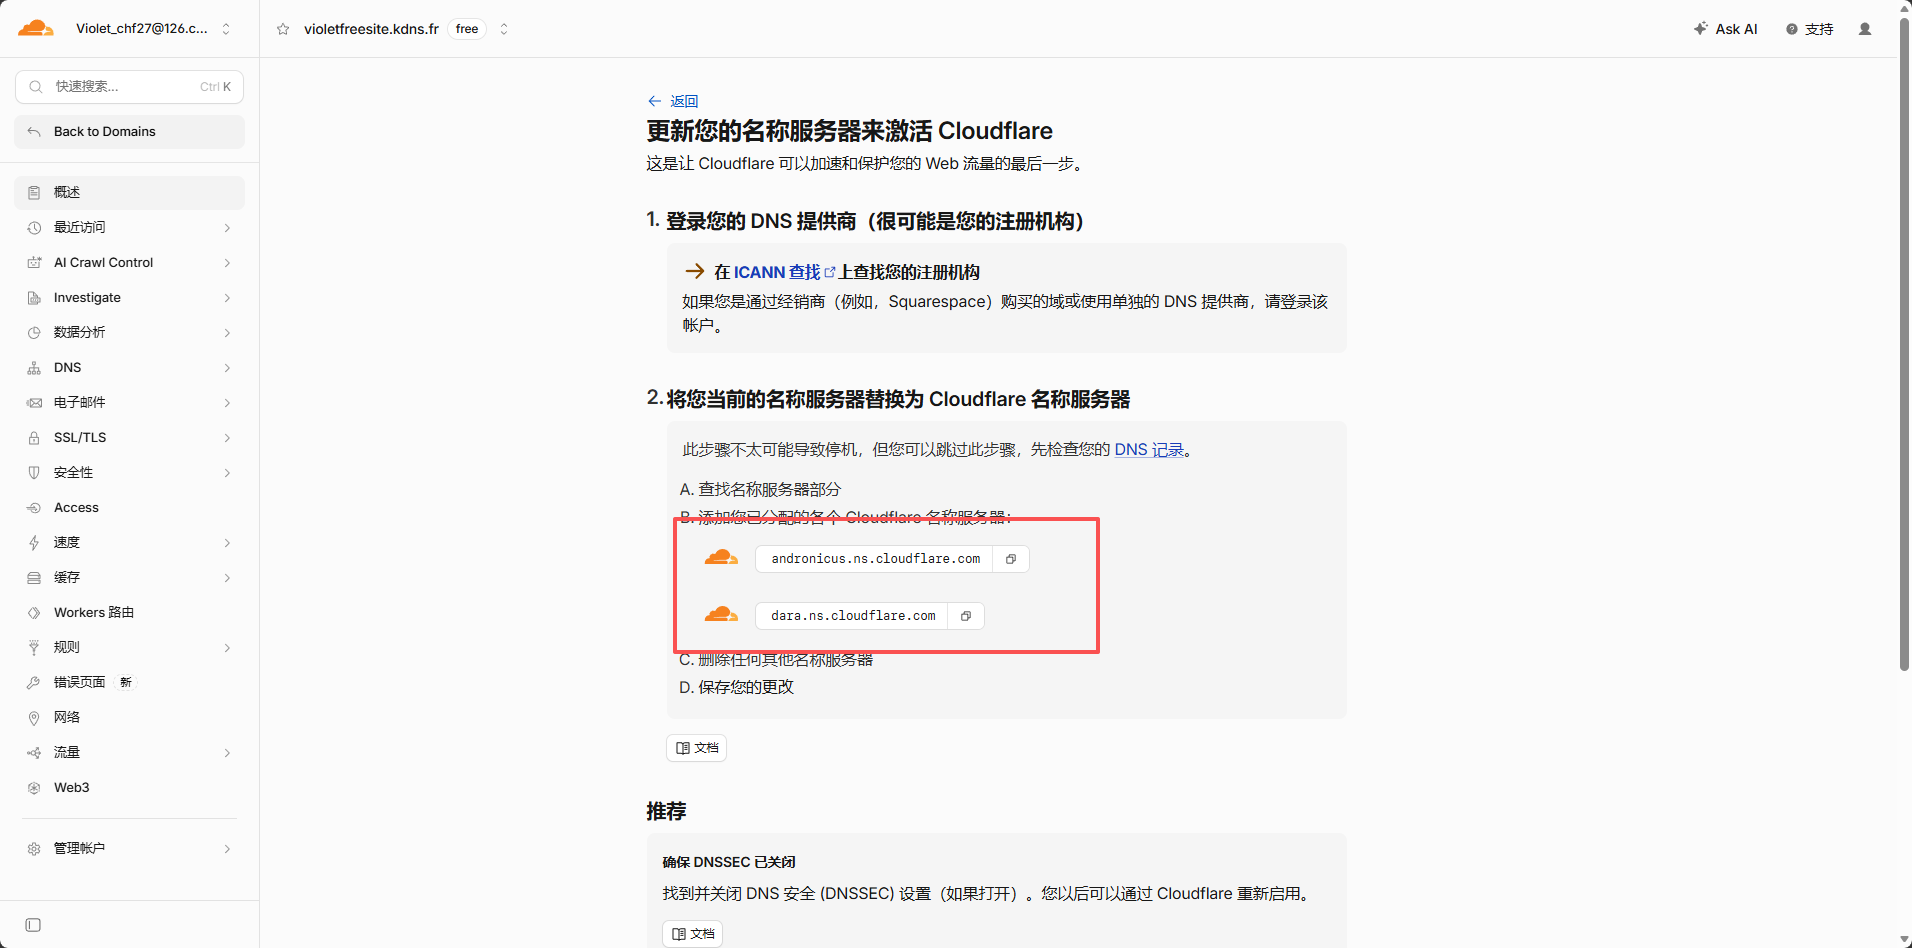
Copy these two addresses, as you will need to enter them back into KataBump in the next step.
6. Return to KataBump and Enter the Name Servers
Open the KataBump domain management page and locate the Nameservers section.
Enter the two name server addresses provided by Cloudflare into NS1 and NS2, then click “Save nameservers” to save.
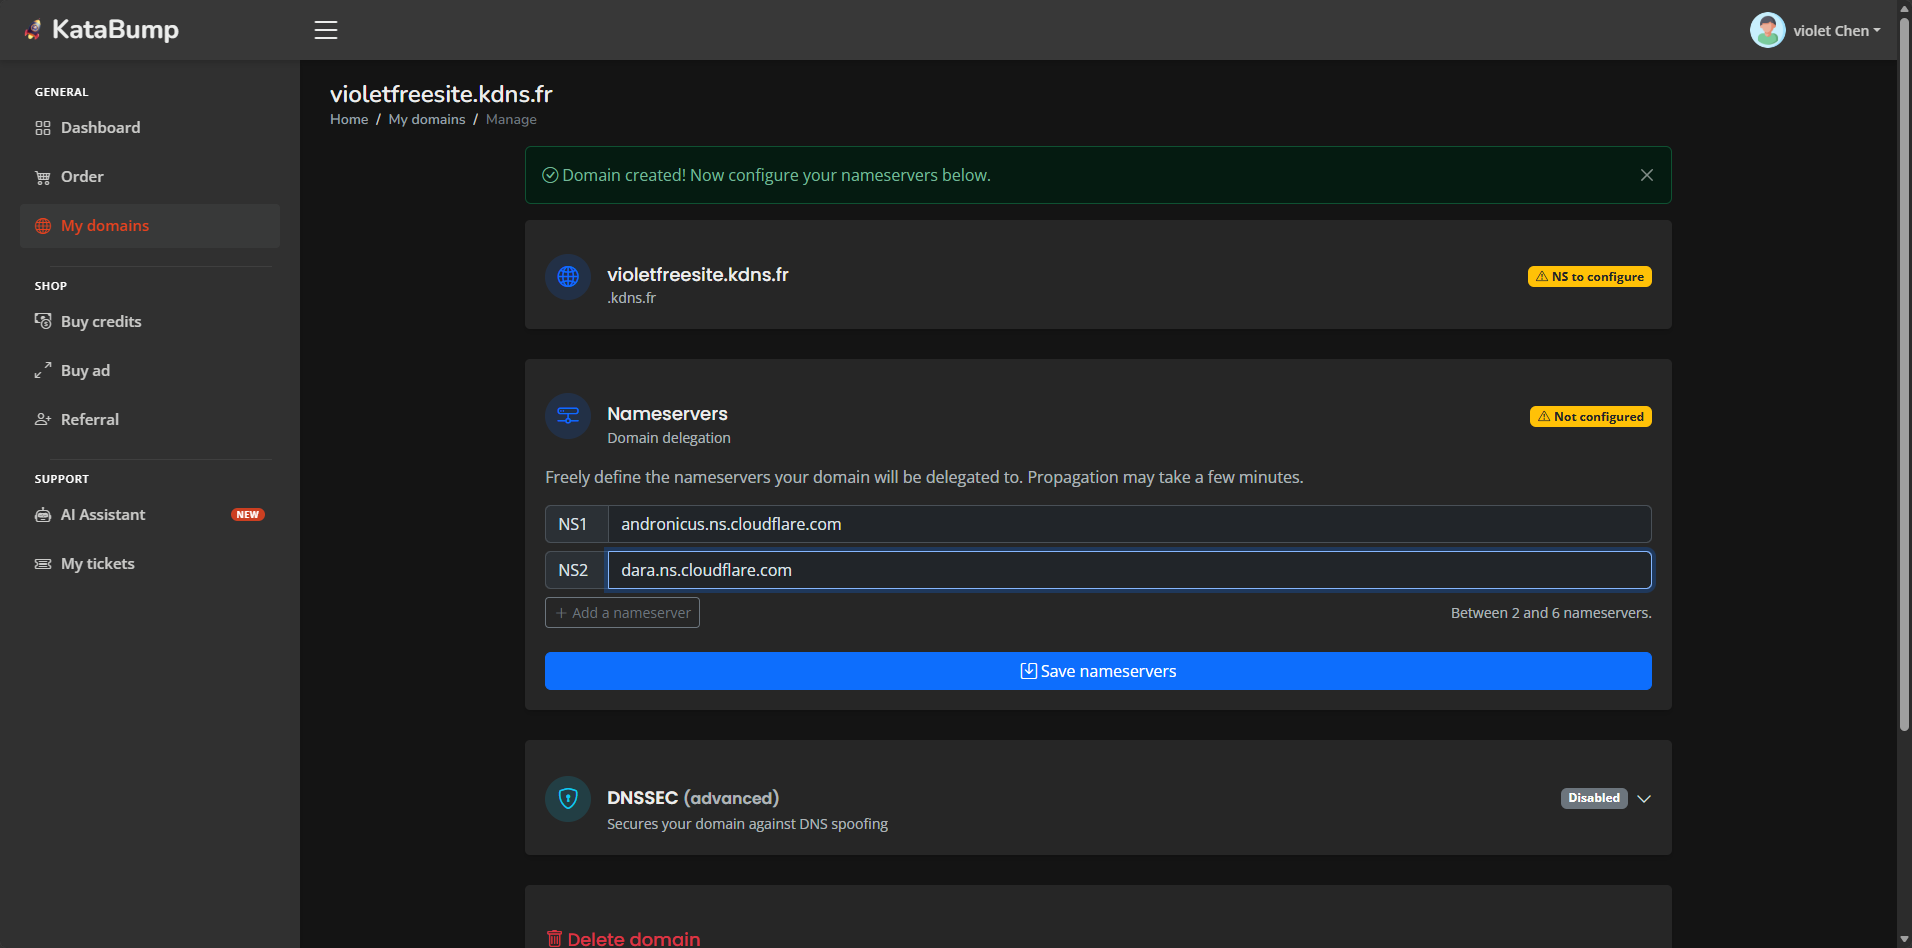
Note: It usually takes a few minutes to several hours for name server changes to take effect globally. If Cloudflare immediately indicates that no updates were detected, please be patient and do not re-enter the values repeatedly.
7. Confirm the Update in Cloudflare
Once the name servers have taken effect, return to Cloudflare’s activation page and click the “I have updated the name servers” button.
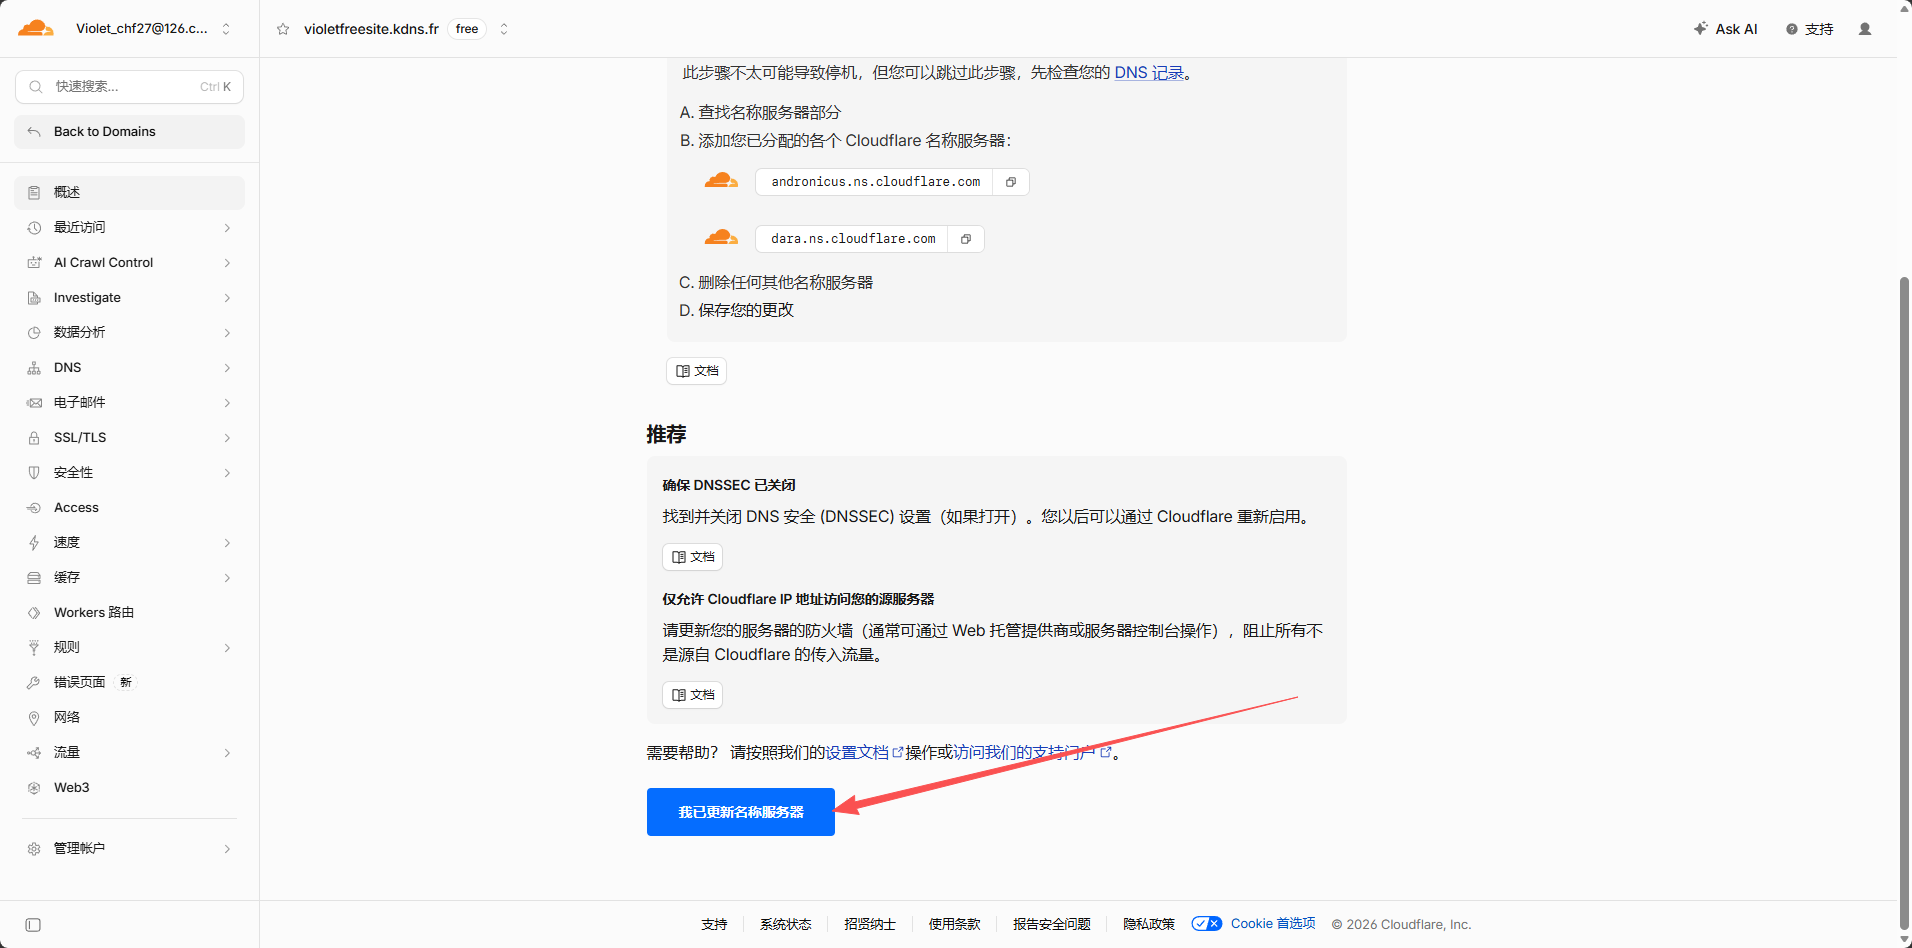
Cloudflare will check your domain name. If the configuration is correct, the domain status will change to “Active”.
6. Phase 3: Deploy the Website with Cloudflare Drop
Cloudflare Drop is an official tool from Cloudflare for uploading static websites. It allows you to directly upload a local folder or a zip file to create a publicly accessible website.
1. Open Cloudflare Drop
Visit:
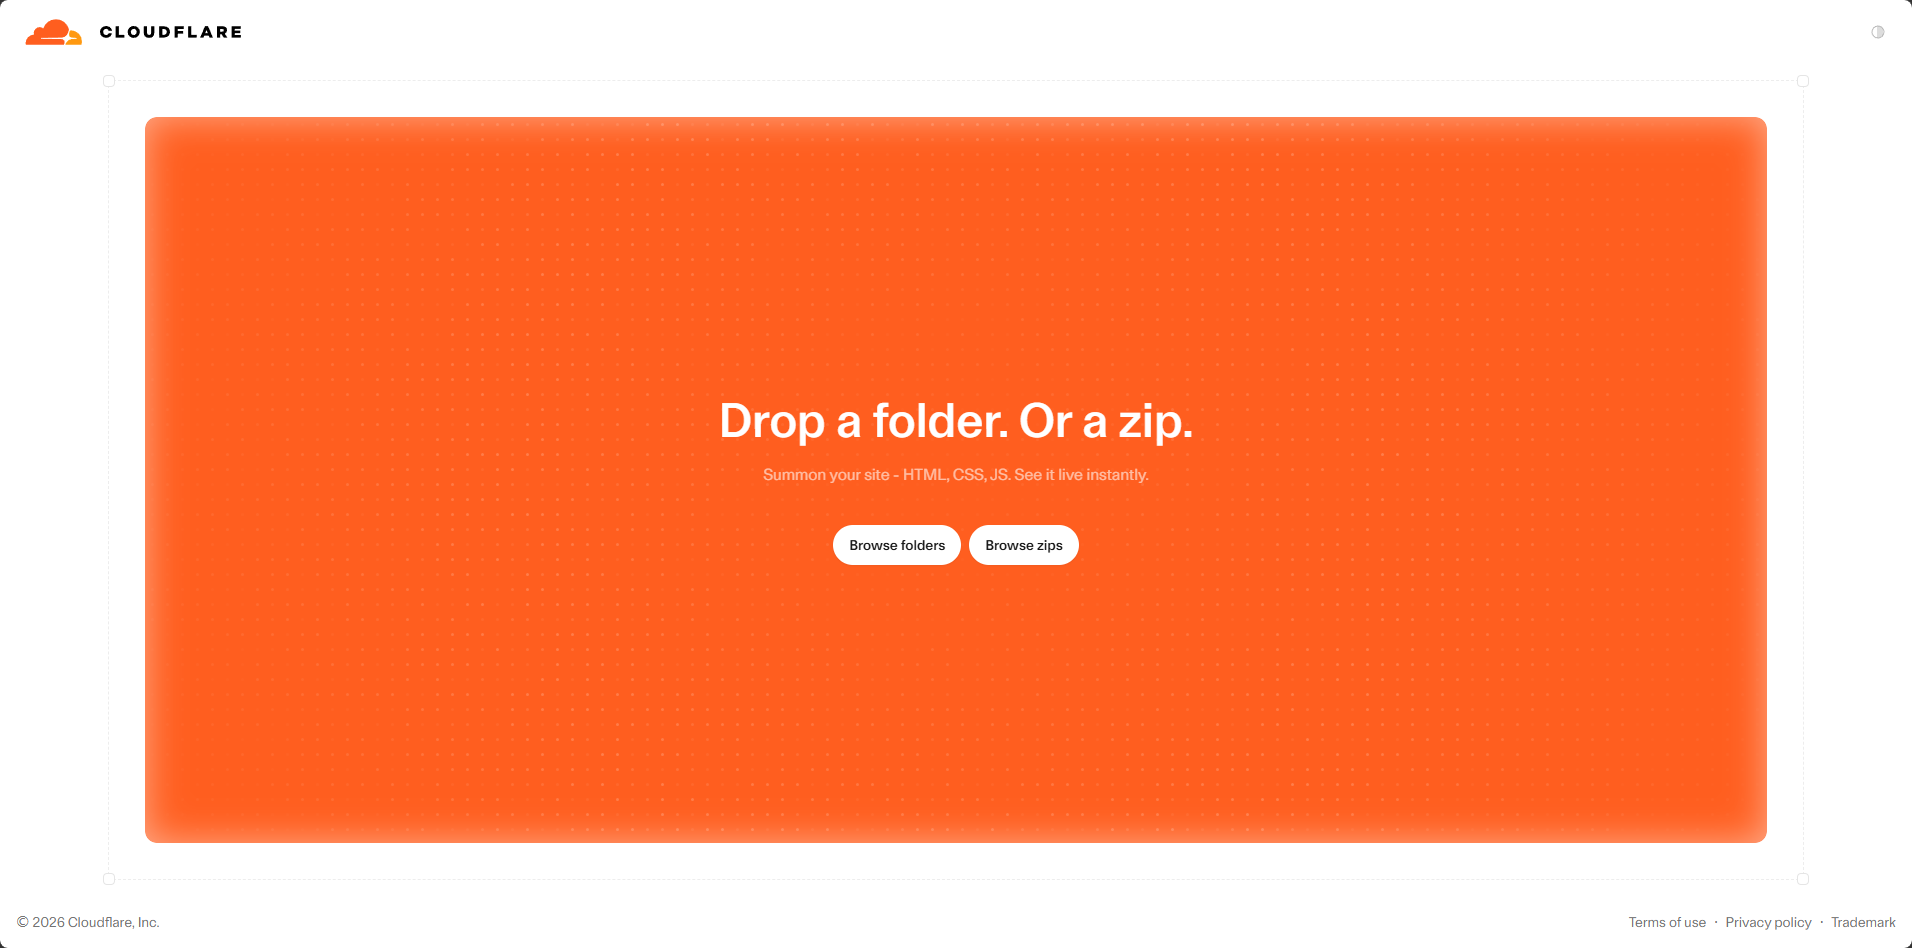
https://www.cloudflare.com/drop/You will see a simple, orange drag-and-drop upload page with the following message:
Drop a folder. Or a zip.
2. Choose the Upload Method
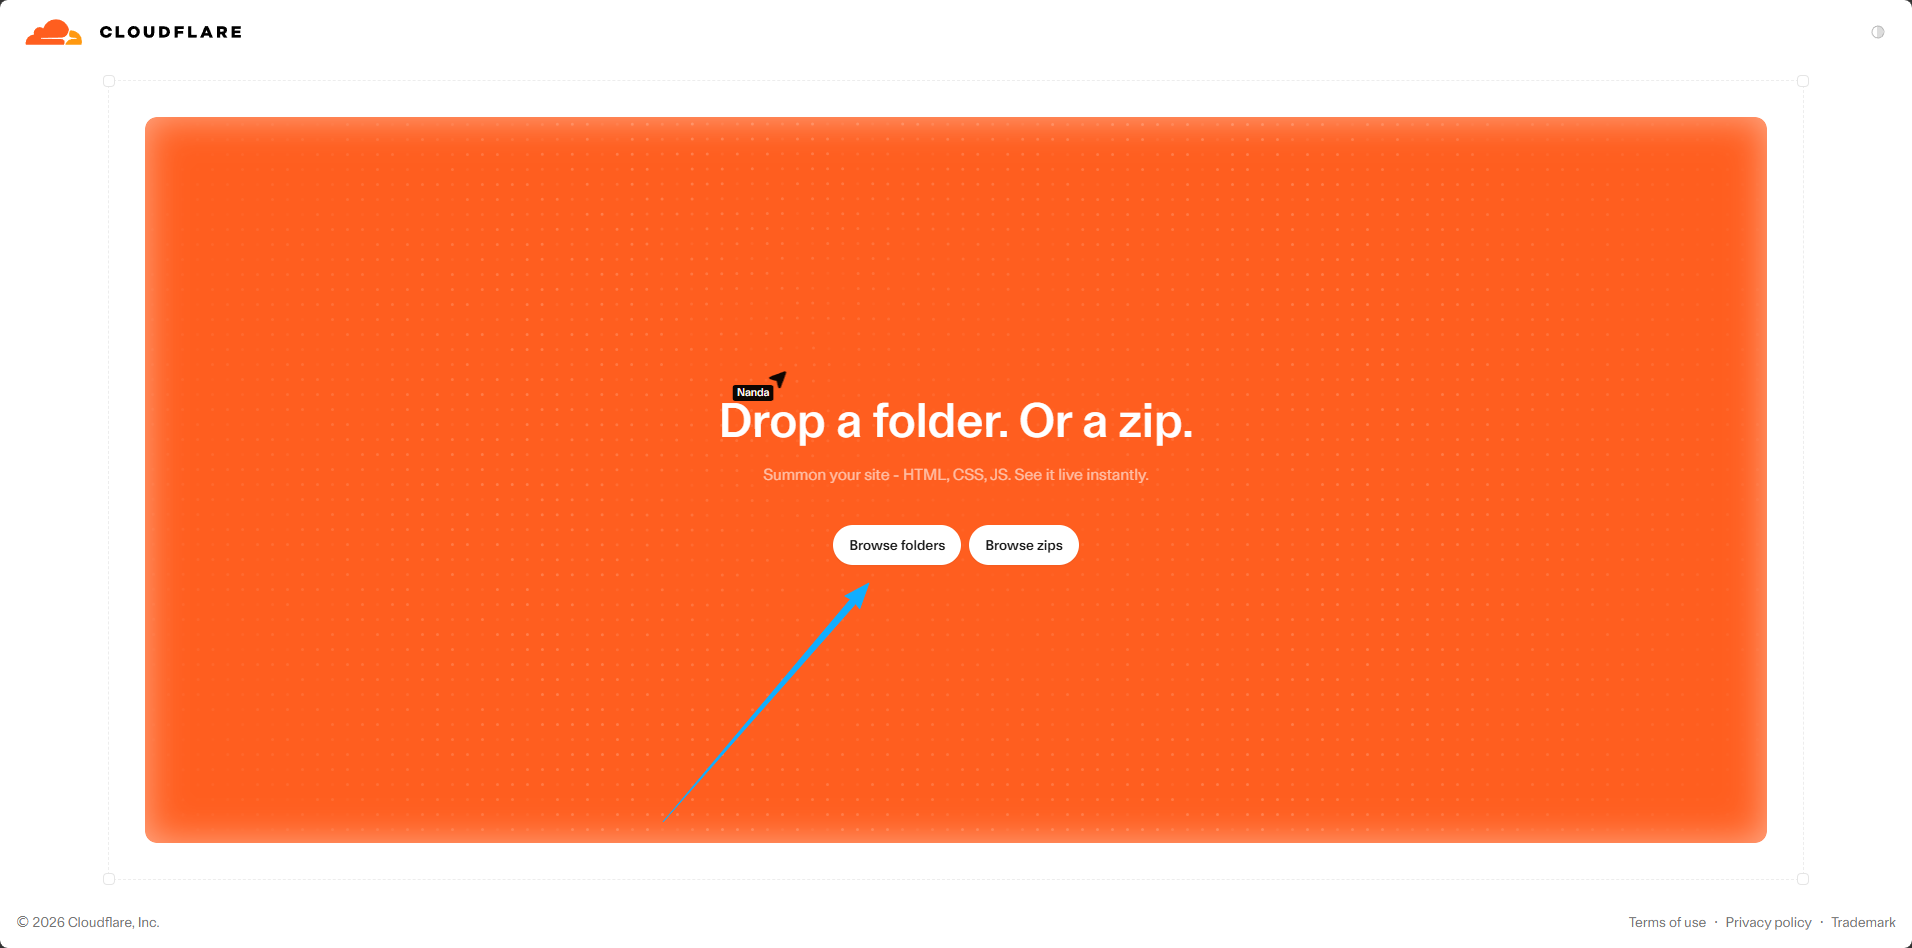
The page offers two buttons: “Browse folders” and “Browse zip”. Since we have already extracted the website folder, click “Browse folders”.
3. Select Your Website Folder
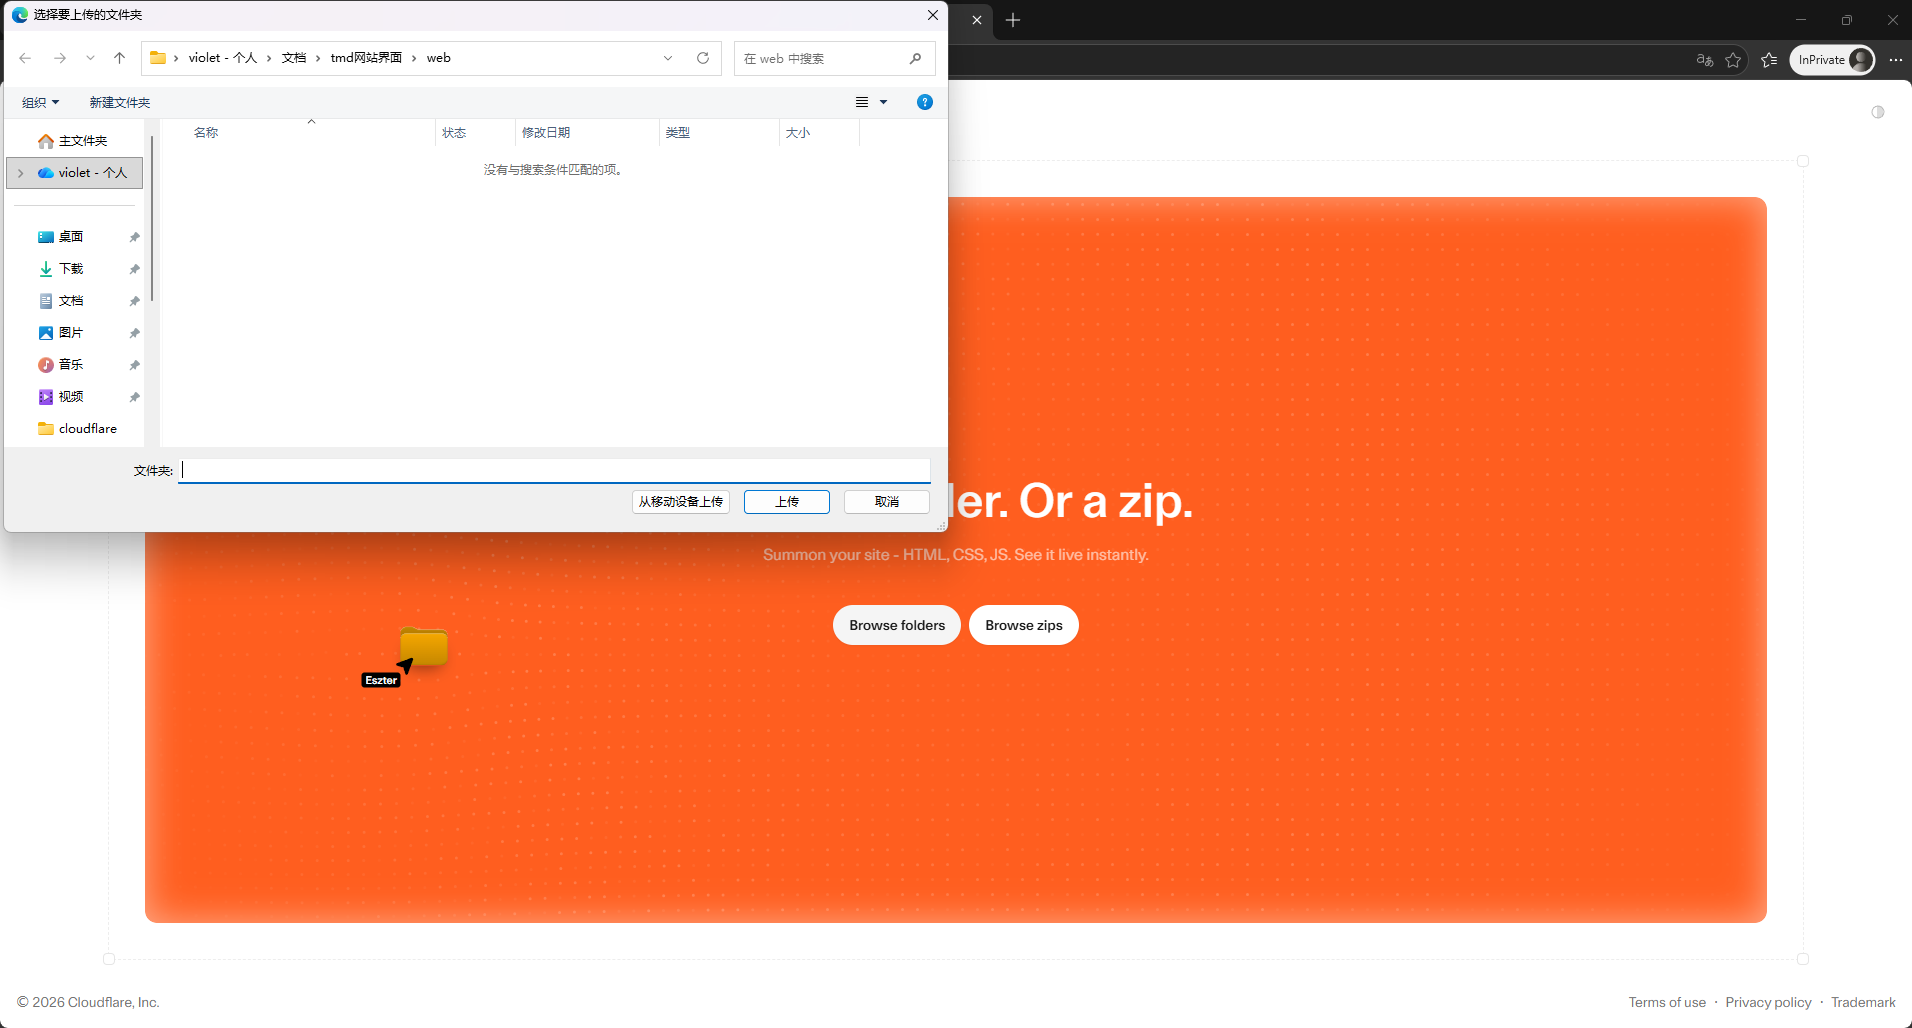
In the pop-up file selector, locate and select the folder that contains the AI-generated website files.
Key Reminder: Make sure you select the folder itself, not just a single
index.html. Also, the root directory of the folder must containindex.html; otherwise, the deployment will fail or show a blank page.
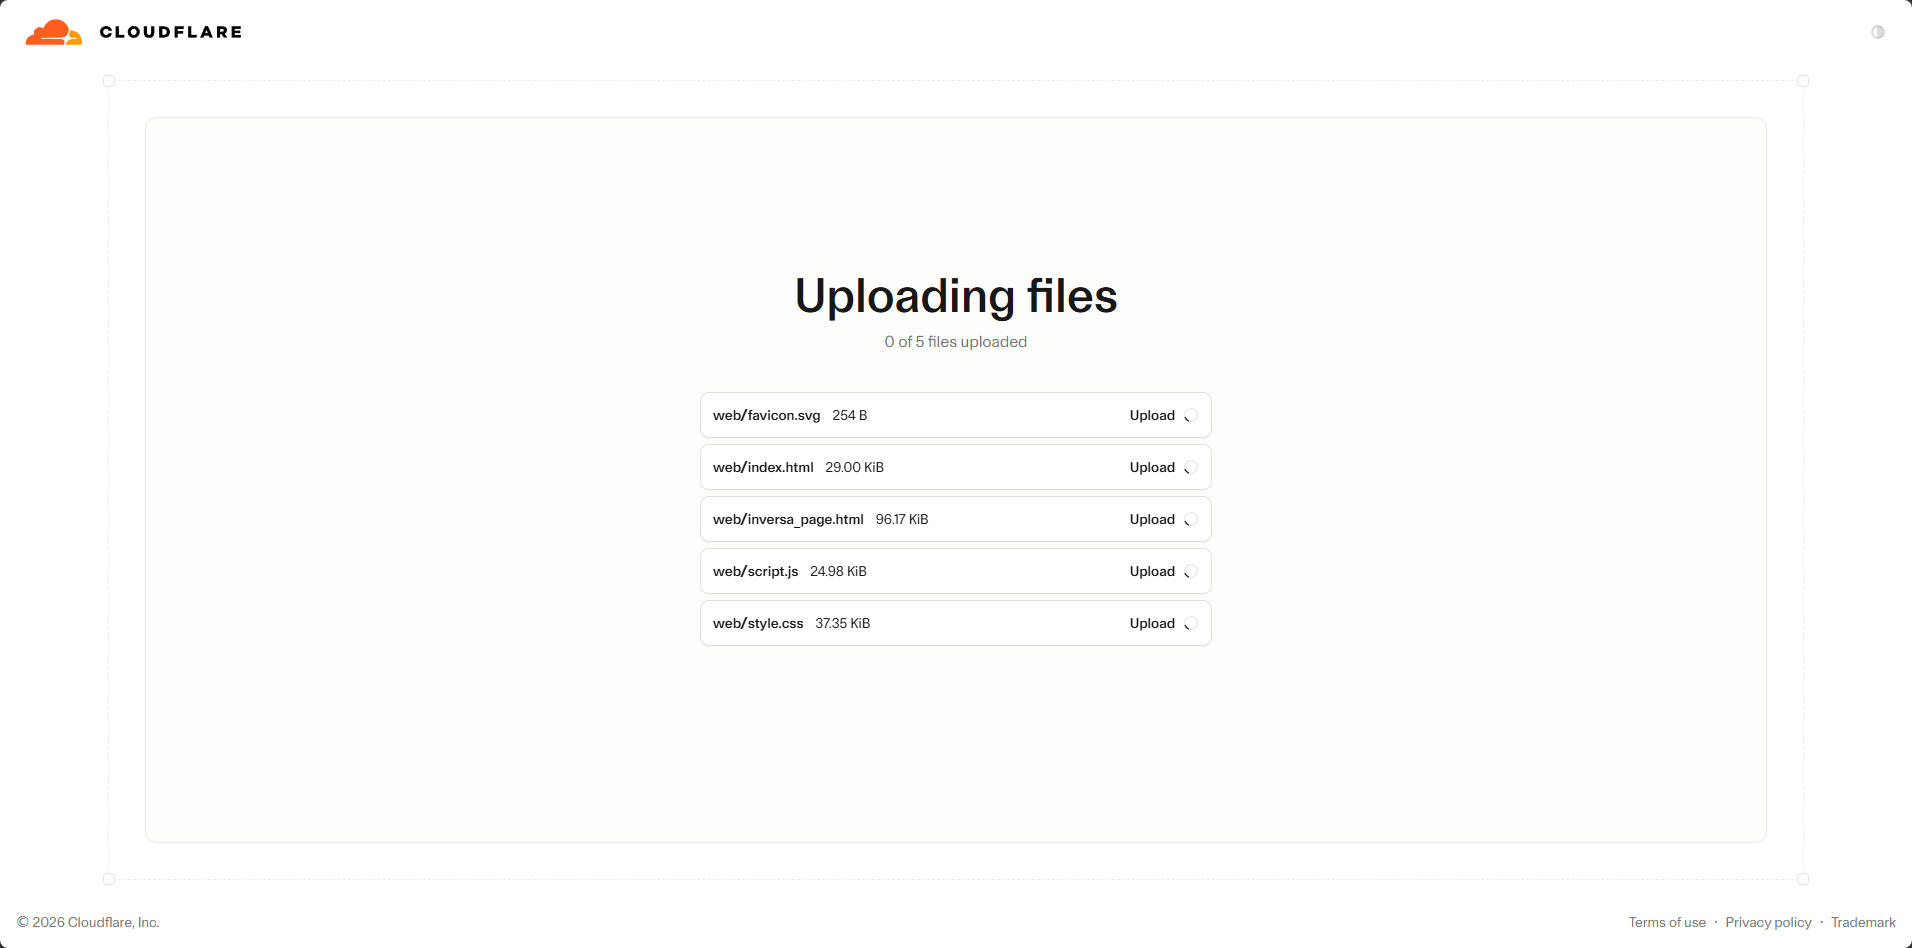
4. Wait for the Upload
The upload process will display its progress. Depending on the file size and your internet speed, this may take a few seconds to several minutes.
5. Deployment Successful
Once the upload is complete, Cloudflare will automatically deploy the website and generate a temporary domain name, such as xxxxx.pages.dev.
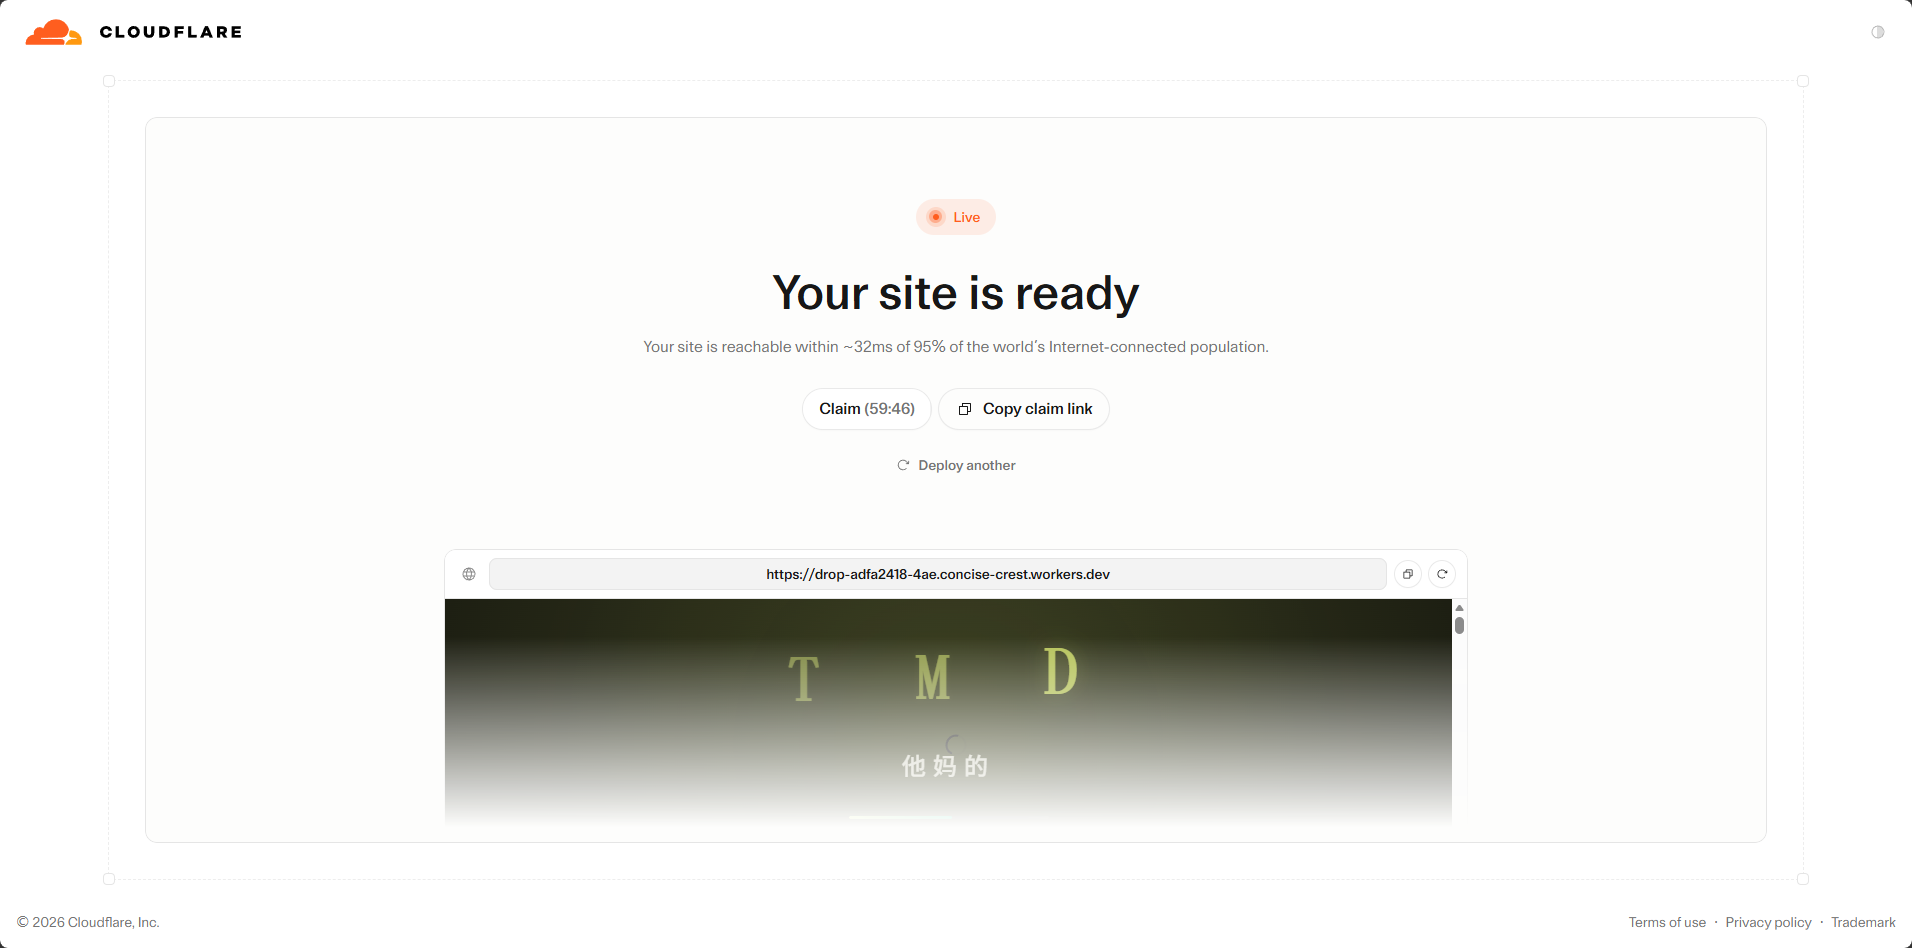
At this point, you can access the website using the temporary domain name, but it has not yet been bound to your own domain name.
7. Phase 4: Claim the Site and Bind Your Own Domain
To use the free domain name you obtained from KataBump with your website, you also need to claim the Cloudflare Drop site under your own Cloudflare account and add a custom domain name.
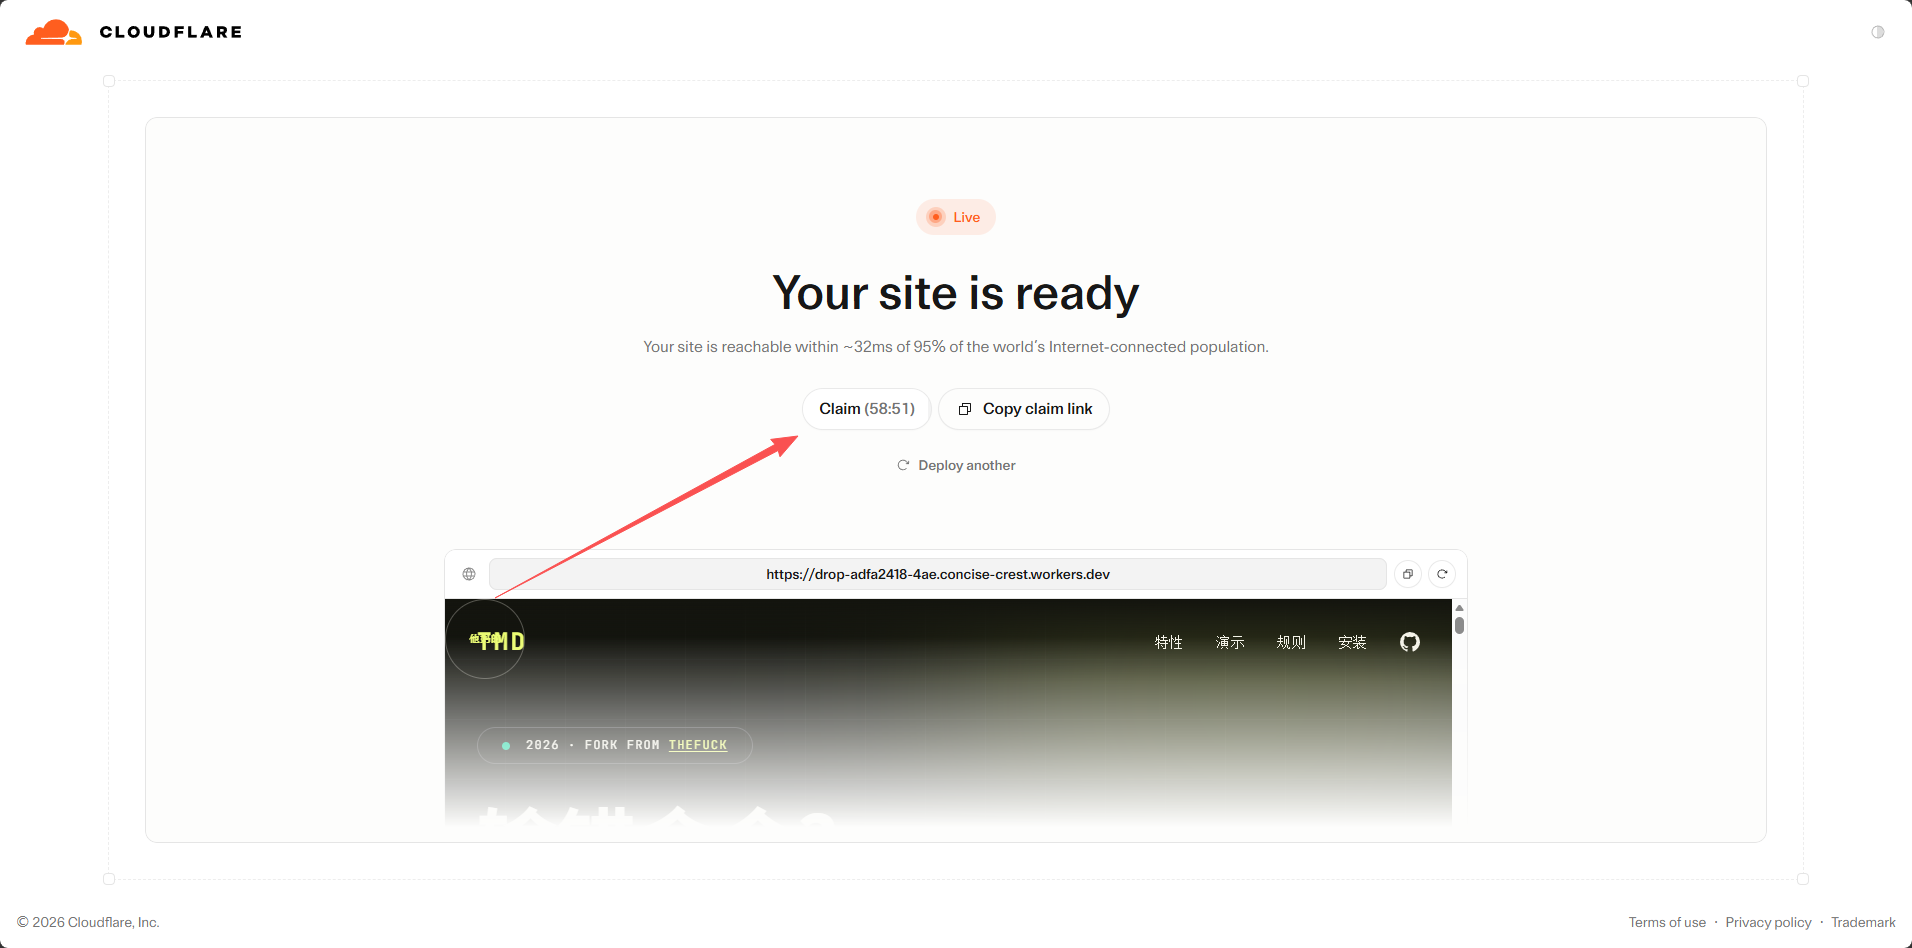
1. Click “Claim”
After the deployment is successful, click the “Claim” button on the page.
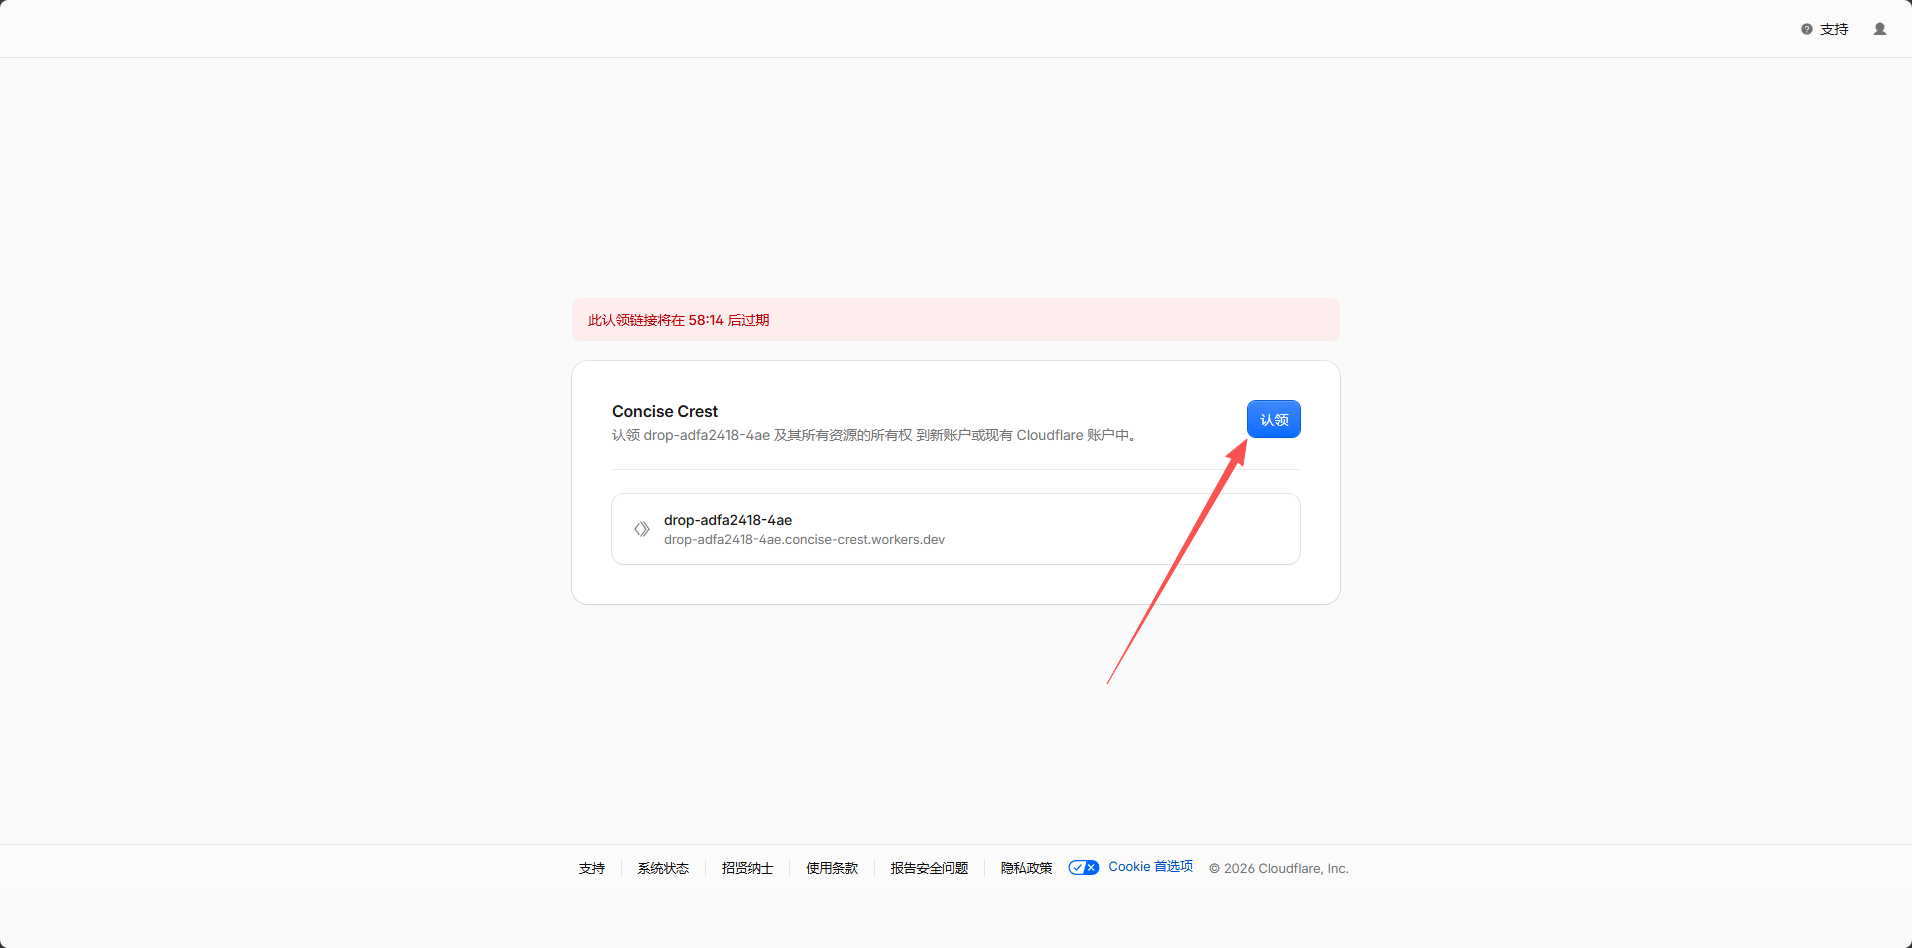
2. Reconfirm the Claim
The system will redirect to a new page; click the claim button again to complete the confirmation.
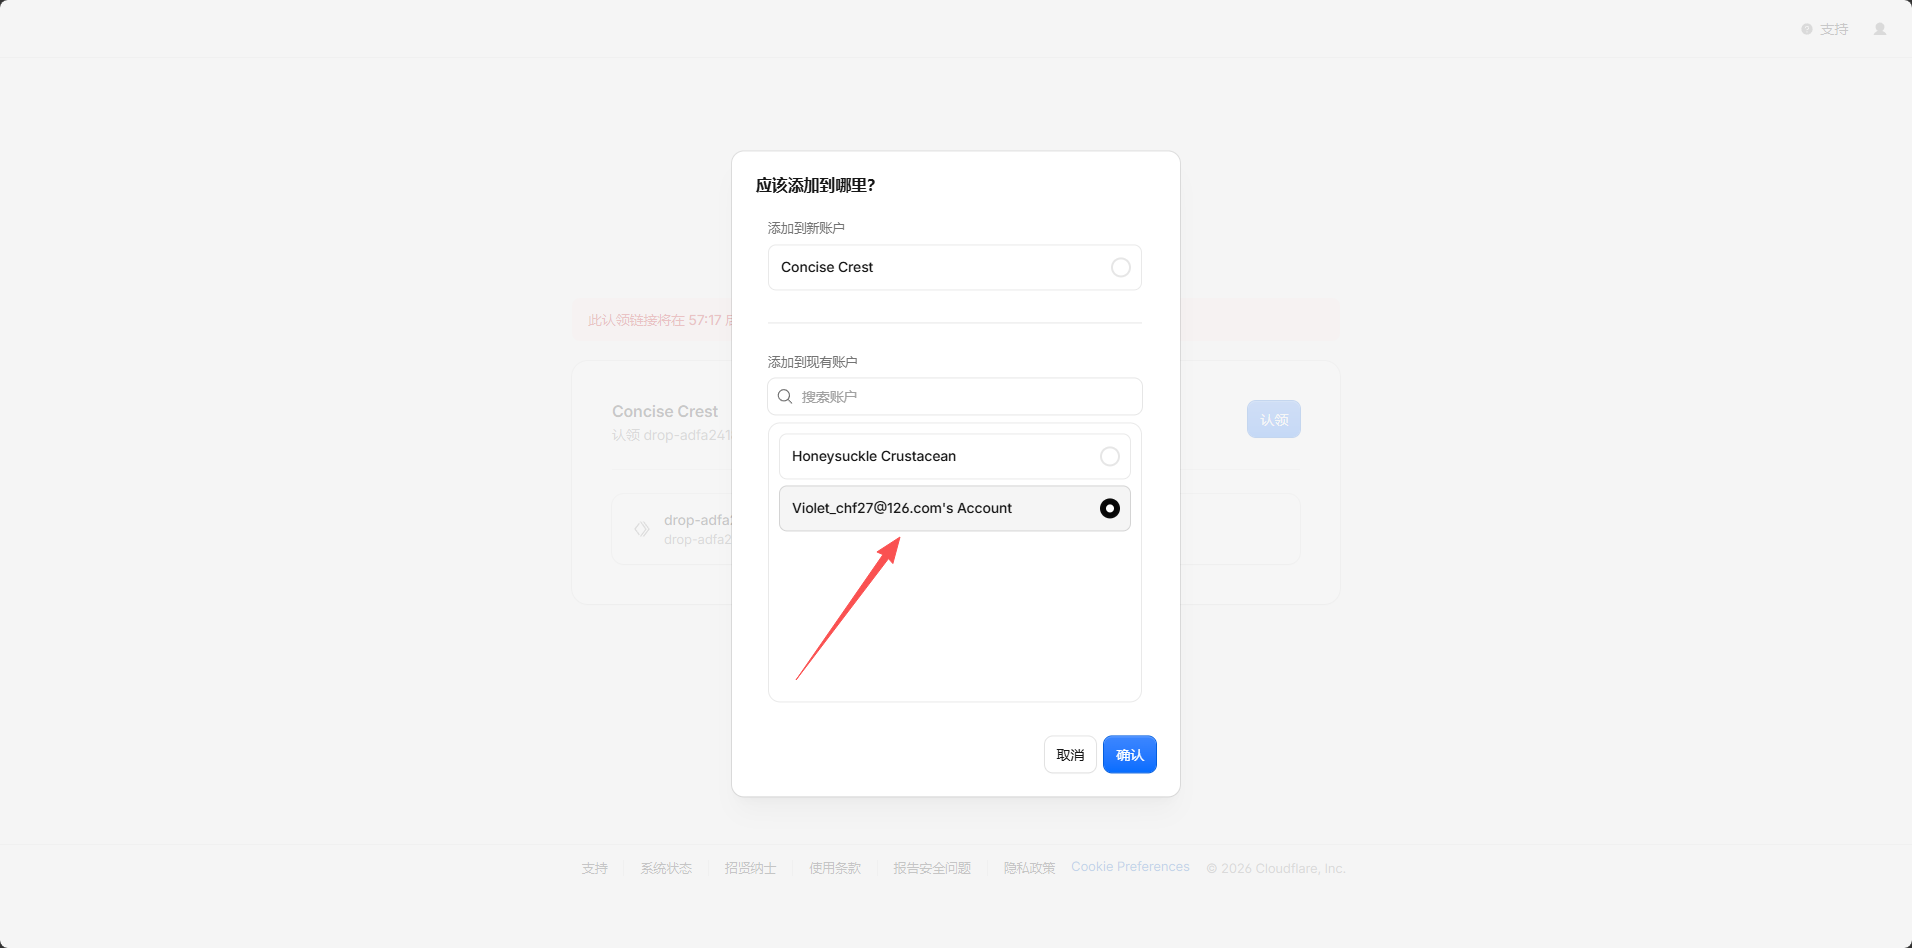
3. Select Your Cloudflare Account
Choose the Cloudflare account you just logged in to.
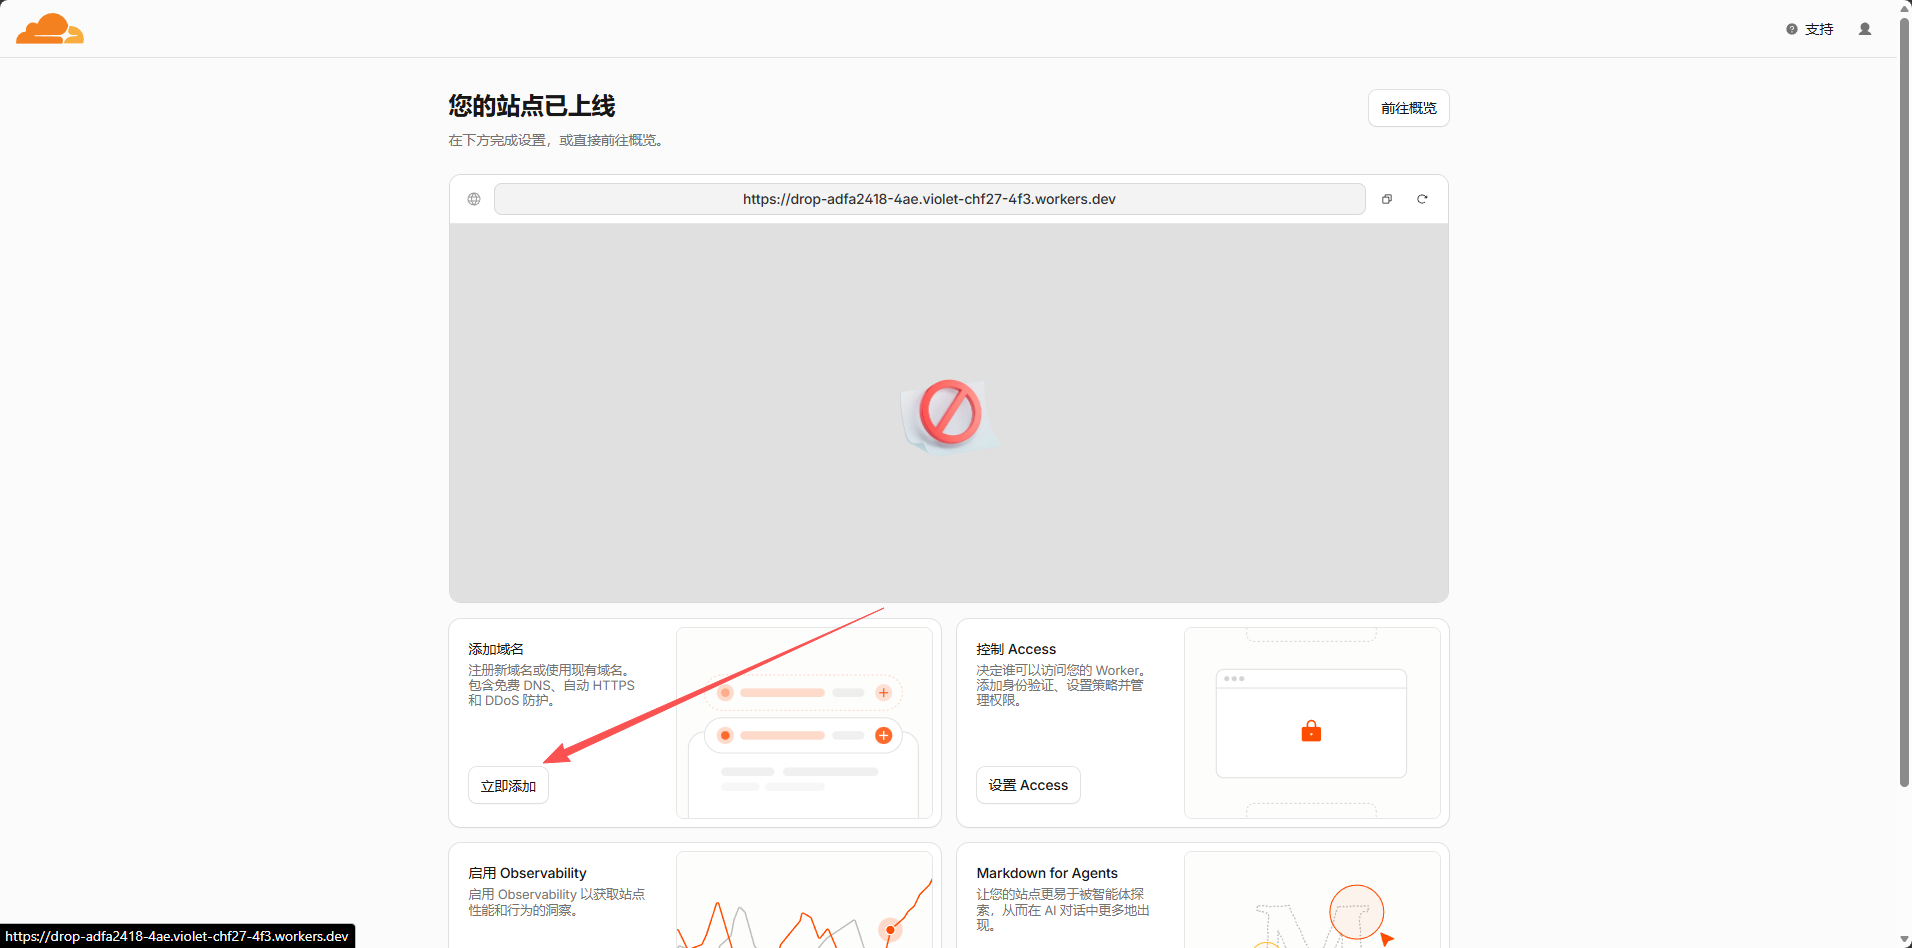
4. Add the Domain Immediately
After the claim is successful, enter the Cloudflare Drop website management interface. Click “Add domain now”.
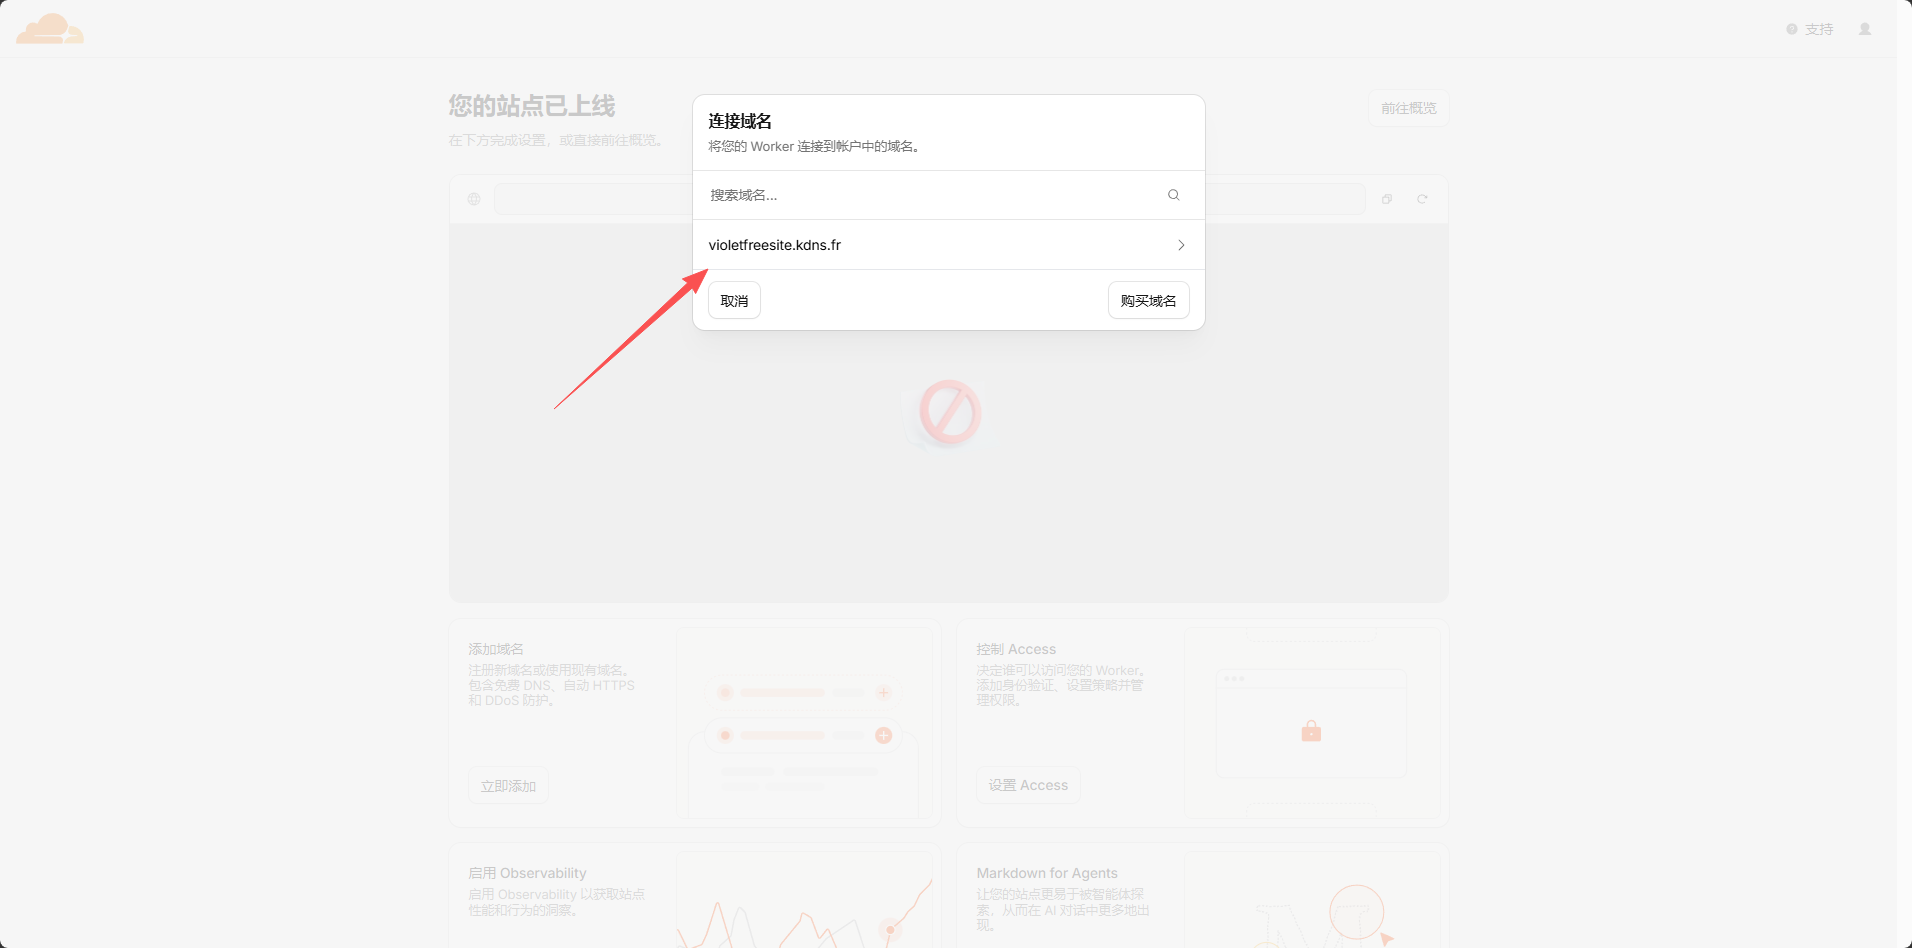
5. Select Your Free Domain Name
From the pop-up domain name list, select the domain name you obtained earlier from KataBump.
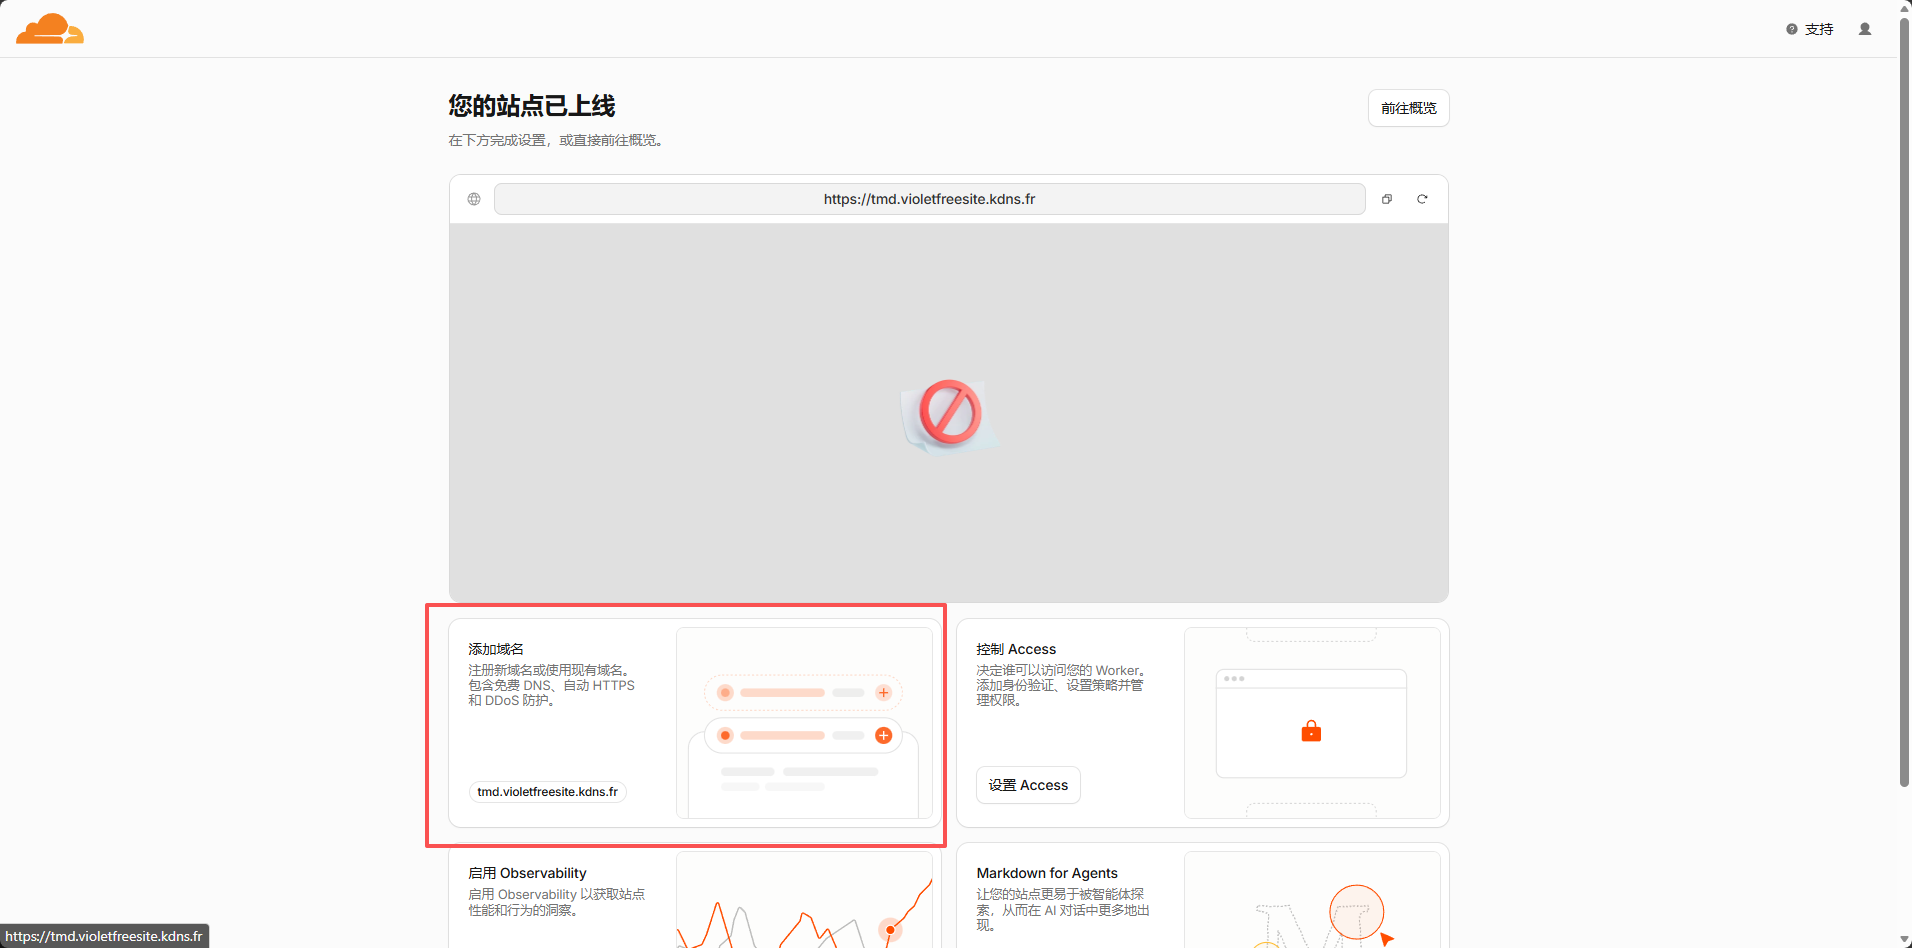
6. Confirm the Domain Was Added Successfully
Once the addition is successful, you will see your domain name listed in the “Added Domains” section on the “Website Management” page.
7. Access the Website Using the Domain Name
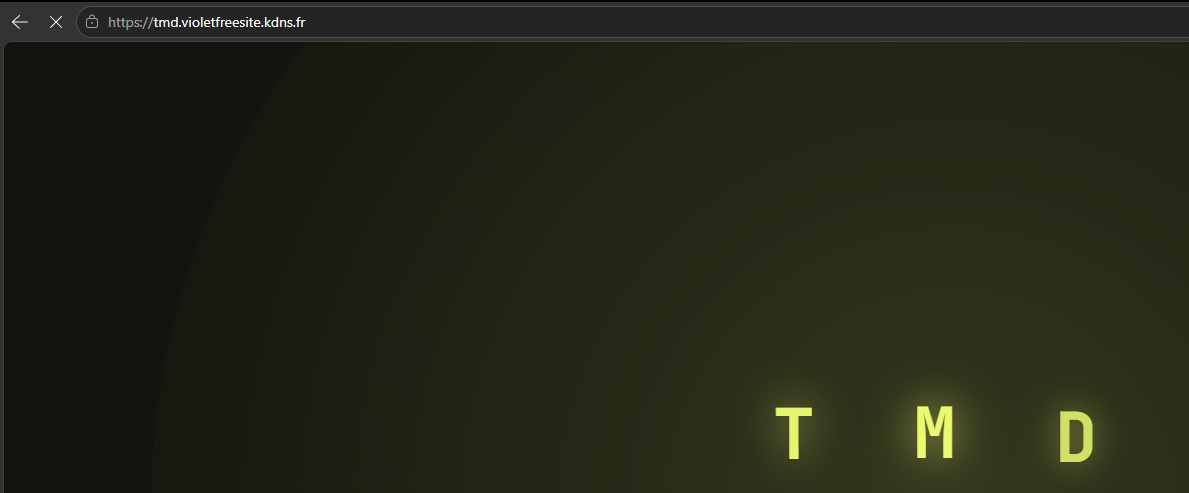
Now, open your browser and enter your domain name, for example:
https://yourname.kdns.frIf everything is working correctly, your AI website is now officially live!
8. Common Issues and Troubleshooting
1. The domain shows “Site Not Found” or 404
- Make sure Cloudflare Drop has been successfully deployed and the page shows “Deploy successful”.
- Verify that the domain name has been added to the Cloudflare Drop site.
- Wait 5–10 minutes for the DNS changes to take effect globally.
- Check the domain name status on the Cloudflare domain overview page to ensure it is “Active”.
2. The domain opens to Cloudflare’s default page
- Check whether the name servers in KataBump have really been changed to the two addresses provided by Cloudflare.
- Ensure that enough time (up to 24 hours) has passed since the name servers were saved.
3. The website’s style or images are missing after uploading
- Check whether the CSS/JS/image paths referenced in
index.htmlare correct. - If the AI generated relative paths (such as
./style.css), there is usually no problem. - If absolute paths (such as
/style.css) are used, make sure the files actually exist, or change them to relative paths.
4. The website opens blank
- Make sure the root directory of the folder contains
index.html. - Verify that the file encoding is UTF-8.
- Press
F12to open the browser console and check for any JavaScript errors.
5. How do I update a deployed website?
Cloudflare Drop currently does not support automatic synchronization of local files. After you modify the website, you need to repackage or reselect the folder and upload it again. Once the upload is successful, the original domain name will automatically point to the latest version.
9. Summary
By following this tutorial, you have completed the following:
- Obtained a domain name for free from KataBump;
- Hosted the domain name’s DNS on Cloudflare;
- Used Cloudflare Drop to upload and deploy a static website;
- Bound the domain name to the Cloudflare Drop site;
- Accessed the live website through your custom domain name.
The entire process does not require purchasing a server, configuring Nginx/Apache, or binding a credit card. For beginners who want to quickly build a website with AI, this is one of the cheapest ways to get online today.
If you want a longer-lasting free domain name, you can also refer to another article: “Zero-Cost Website Building: A Detailed Guide to Getting a Permanent Second-Level Domain and Hosting It on Cloudflare for Free.”